Welcome to the ultimate guide to growing cannabis, where we delve into the art and science of cultivating this amazing plant both indoors and outdoors. Whether you're an experienced grower or a curious beginner, this comprehensive A-to-Z manual will equip you with the knowledge and insight to cultivate healthy, vibrant cannabis plants from seed to harvest. GanjaSeeds experts are more than happy to share their experiences, advice, secrets, and tips to make this endeavor as rewarding as it is successful.
Cannabis Diversity. Which Cannabis Seeds to Choose?
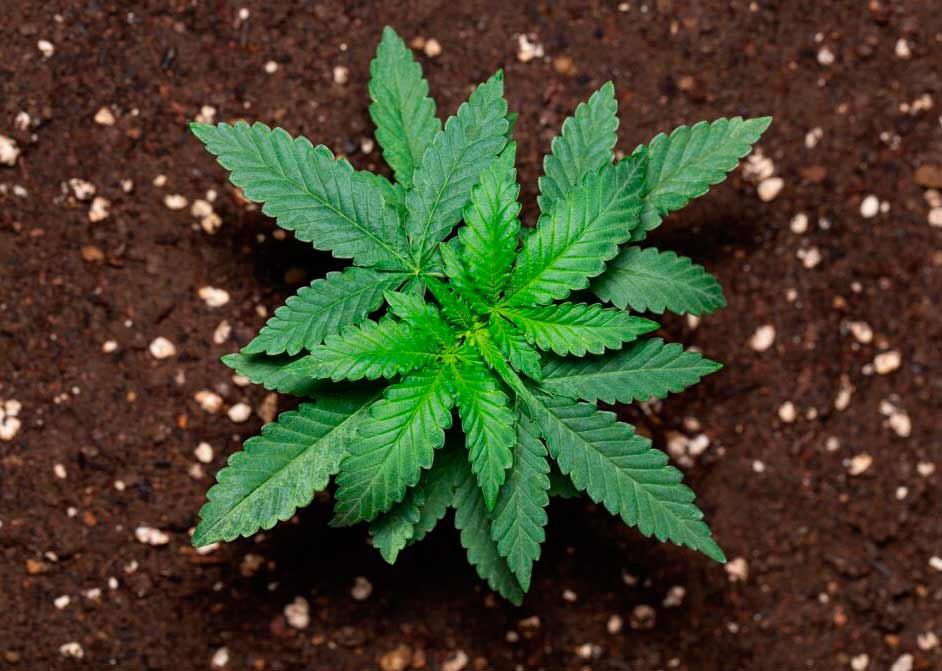
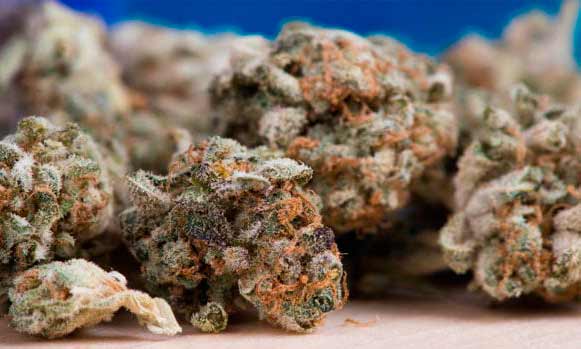
Currently, there are more than 700 different strains and 46 landraces of cannabis in the world. Each of them is unique in its own way and differs in growing conditions, flowering period and yields.
Depending on phenotype cannabis is divided on:
Cannabis indica
Cannabis sativa
Cannabis ruderalis
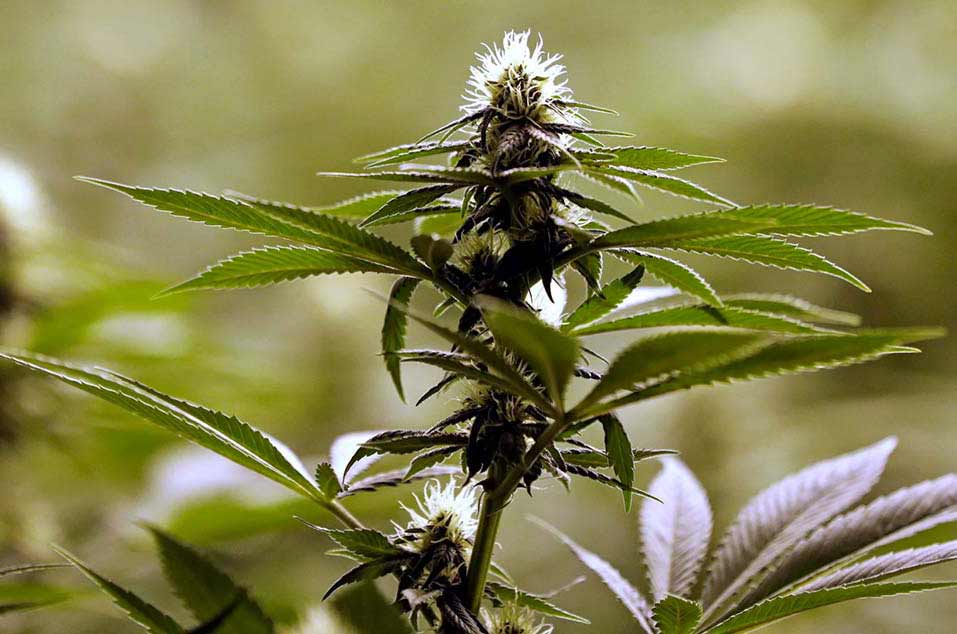
Indica is a low-profile plant with a wide branching structure and broad palm of leaves. Geographically originating from India or Afghanistan, indica is characterized by a pronounced sedative effect - the so-called "stone". Indica stimulates the appetite, gently calms the nervous system, and eliminates sleep disorders. The most potent indica strains relieve pain syndromes.
Sativa is a tall plant with long branches and thin, elongated leaves. Its natural habitat is usually humid tropical areas. It is characterized by an extended growing and flowering period. The effect of sativa is commonly associated with a cerebral high, i.e., stimulation of physical and emotional tone, euphoria. In large amounts, sativa can cause panic or anxiety conditions in some individuals.
Depending on the photoperiod, sativa and indica strains are divided into:
Photoperiodic
Autoflowering
Photoperiodic Cannabis Strains
Photoperiodic strains are cannabis strains that transition from vegetative to flowering according to the length of daylight hours. These strains require the grower to maintain a 18/6 lighting schedule during the active vegetative period and then switch to 12/12 lighting when the grower wants the plant to flower.
Autoflowering Cannabis Strains
Autoflowering strains are the opposite of photoperiodic. Ruderalis, or wild-growing cannabis, flowers naturally when a plant reaches a certain age. Flowering begins 2-4 weeks after germination, and it usually takes only 55-80 days for autoflowering strains to complete the cycle. Autoflowering cannabis strains, which trace their roots back to Lowryder, contain ruderalis genetics that make them quick to vegetate and automatically transition to flowering without changing light schedules. Autoflowering strains have a shorter flowering period than photoperiodic strains, which slightly reduces yields.
Depending on feminization, cannabis strains are divided into:
Feminized
Regular
+ Medicinal
Feminized Cannabis Strains
Feminized cannabis strains are derived from the seeds of hermaphrodites that have been subjected to stressful conditions to produce only female plants. These seeds are called feminized. Feminization does not affect the potency, stability or other properties of cannabis. Feminized cannabis seeds produce only female plants. A grower will not have to "fight" the invasion of males and will be able to grow a true sensimilla, an unpollinated female plant, producing the best sticky buds possible.
Regardless of the cultivation technique, feminized cannabis strains have many advantages:
The most important benefit for a grower is that the seeds will give 99% female cannabis plants, and the quality of the final product will not lag behind regular strains.
High immunity. Most known feminized cannabis strains are less susceptible to fungal infections than their counterparts and do not attract a wide range of pests.
High yields.
Regular Cannabis Strains
Regular strains are the opposite of feminized strains. This means that regular cannabis strains are ordinary, common seeds from which both male and female plants can grow.
Medicinal cannabis strains are characterized by their specific purity and high concentration of active compounds that are effective against certain diseases. For example, sativa is known for its ability to relieve migraine headaches. In addition to THC, cannabis contains a wide range of organic compounds, cannabinoids, including CBD and CBG, which are not mind-altering, but have anti-seizure, anti-inflammatory, and other therapeutic benefits that have shown great promise in medicine.
How to Properly Germinate Cannabis Seeds?
Germination is the first, most crucial and decisive step in your cannabis cultivation journey. It is the process where the seed awakens from dormancy and begins to sprout, initiating the growth of a new plant. Proper germination lays the foundation for healthy and robust cannabis plants. Let's explore some proven germination methods, along with tips provided by GanjaSeeds experts, to ensure successful sprouting.
Water Germination
One of the easiest and most effective ways to germinate cannabis seeds is the water method.
Here's how it works:
Step 1: Fill a glass with clean, room temperature, pH-balanced water (approximately 6-7 pH).
Step 2: Gently place your seeds in this water and cover the glass to maintain darkness, which promotes germination.
Step 3: Allow the seeds to soak for about 18-24 hours. During this time, the water will penetrate the seed's outer shell, initiating the germination process.
Step 4: After soaking, place the seeds on a damp paper towel or cotton pad and cover with another damp layer of the same material.
Step 5: Keep the paper towel or cotton pad in a warm, dark place. Check daily for sprouting taproots.
Step 6: Once the taproot emerges (usually within 1-7 days), carefully transfer the germinated seeds to your chosen growing medium, making sure the taproot is facing down.
Paper Towel Method
The paper towel method is a popular and reliable germination technique.
Follow these steps for successful sprouting:
Step 1: Moisten a paper towel with pH-balanced water until it is damp but not soaking wet.
Step 2: Place your cannabis seeds evenly on one half of the damp paper towel.
Step 3: Fold the paper towel over the seeds to completely cover them, then place in a sealed plastic bag (Ziploc) or container to retain moisture.
Step 4: Store the container in a warm, dark place (ideally around 70-85 °F or 21-29 °C).
Step 5: Check the seeds daily to monitor progress and make sure the paper towel remains moist but not waterlogged.
Step 6: Once the taproot is about 0.25-0.5 inches long, it's time to gently transplant the germinated seeds into your chosen growing medium.
Direct Planting
For those who prefer a more straightforward approach, direct planting involves placing cannabis seeds directly into the growing medium.
Here's how it's done:
Step 1: Fill a small pot or container with your chosen growing medium (soil, coco, or hydroponics).
Step 2: Make a small hole in the center of the medium, about 0.25-0.5 inches deep.
Step 3: Place a single seed in each hole and gently cover with the growing medium, taking care not to plant the seed too deeply.
Step 4: Water the medium lightly to provide initial moisture for germination.
Step 5: Place the container in a warm, dark location with stable temperatures (about 70-85 °F or 21-29 °C).
Step 6: Be patient and check the container daily. Once the seedling emerges, make sure it receives enough light to continue its growth journey.
Tips from the Pros
Maintain consistent temperature and moisture levels during germination to prevent stress and increase successful sprouting rates.
Consider using a seedling heat mat to maintain ideal germination temperature and boost germination rates.
Avoid excessive handling of germinated seeds as they are delicate at this stage. Use sterilized tools or tweezers.
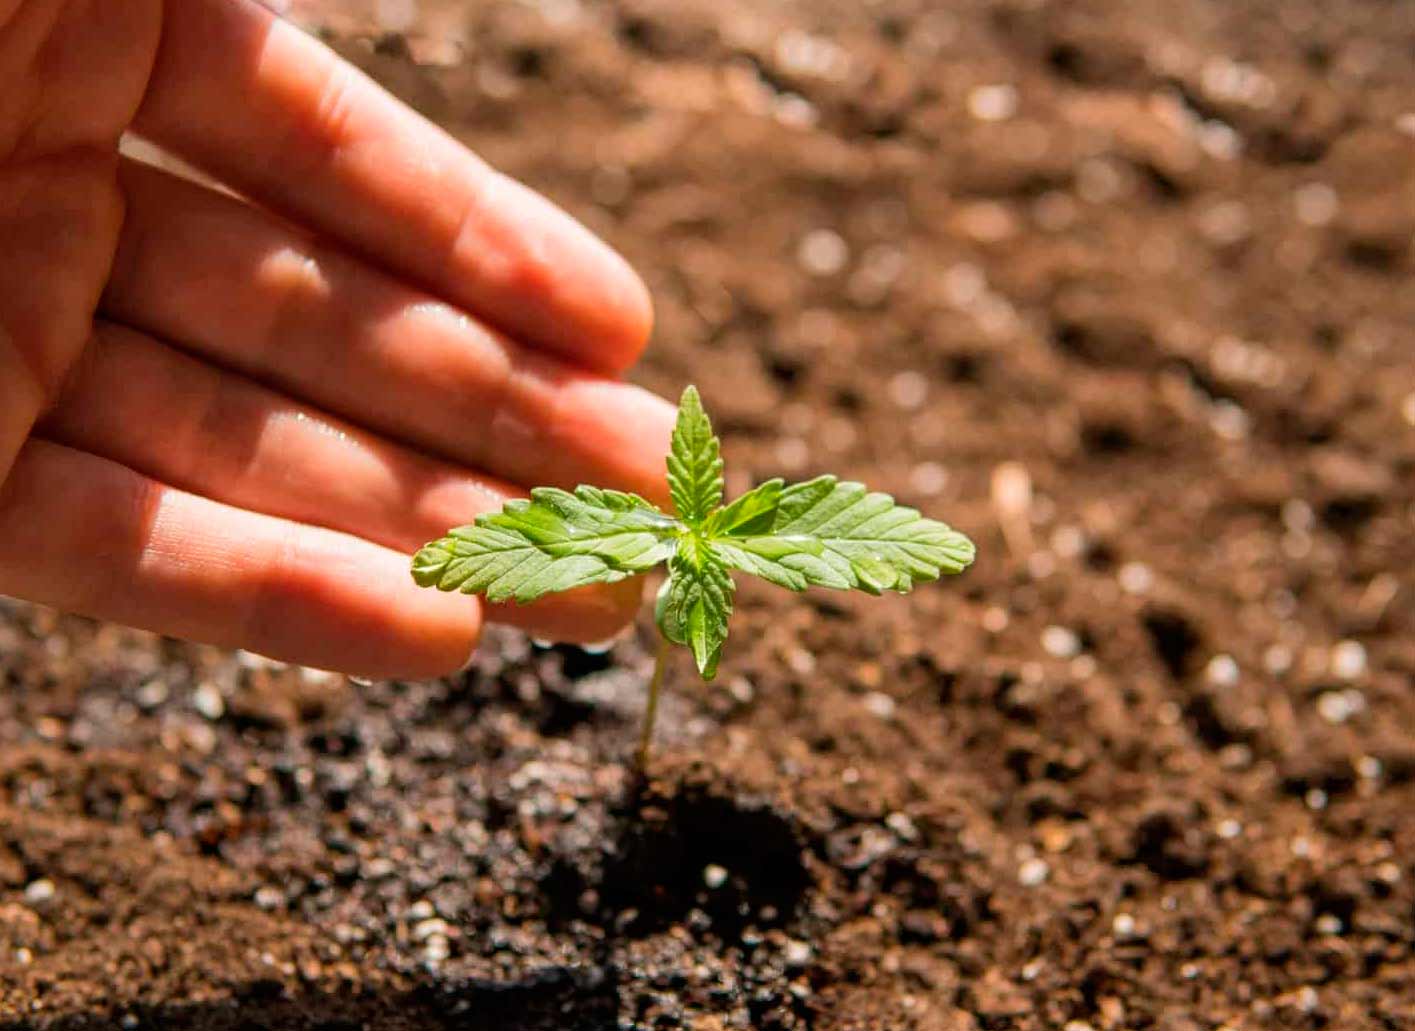
How to Plant Cannabis Seeds
Planting cannabis seeds is an exciting step in your journey as a cannabis grower. This stage lays the foundation for the growth and overall health of your plants. Let's explore how to plant cannabis seeds, and the importance of choosing the right container for successful germination and early growth.
Selecting the Container
Choosing the right container plays a key role in supporting your cannabis seeds during the early stages of growth. Opt for containers that are specifically designed for seed starting and provide adequate drainage. Here are some common container options:
Seedling Trays
These trays often have individual cells that allow you to plant each seed separately. They promote healthy root growth and are easy to transplant once the seedlings are ready for their permanent home.
Small Pots or Cups
If you prefer a more hands-on approach, you can use small pots or cups filled with your chosen growing medium. These containers are easily accessible and suitable for planting a few seeds at a time.
Rapid Rooters or Peat Pellets
These pre-portioned, soilless containers are convenient and provide a sterile environment for germination.
Preparing the Container
Regardless of the container you choose, proper preparation is vital for successful germination. Follow these steps to set the stage for your seeds:
Step 1: Fill the chosen containers with your preferred growing medium (soil, coco coir, or hydroponics). If using soil, make sure it is light, fluffy, and free from any contaminants.
Step 2: Moisten the growing medium with water until it reaches a suitable level of dampness, ensuring it is not overly saturated.
Step 3: Create small holes in the growing medium, approximately 0.25 to 0.5 inches deep, using your finger or a pen. Space the holes appropriately to allow each seedling room to grow.
Planting the Cannabis Seeds
Now that your containers are ready, it's time to plant your precious cannabis seeds. Follow these steps for successful seed planting:
Step 1: Gently place a single seed in each hole you prepared in the growing medium. The seed should be oriented with the pointy end facing downwards. If using seedling trays, ensure you plant one seed per cell.
Step 2: Cover the seeds with a thin layer of the growing medium. Aim to create a light and fluffy covering, allowing the seeds to break through the surface easily.
Step 3: Lightly water the planted seeds using a spray bottle or a gentle stream of water. Avoid overwatering, as this can lead to issues like damping-off disease or rot.
Providing the Ideal Growing Environment
Once your seeds are planted, maintaining the right environmental conditions is essential for successful germination:
Temperature
Keep the growing area at a consistent temperature of around 70-85°F (21-29°C) to encourage rapid and healthy germination.
Light
During the germination stage, your seeds do not require intense light. Natural ambient light or low-intensity fluorescent lighting is sufficient until the seedlings emerge.
Humidity
High humidity levels (around 70-80%) are beneficial for germination. Use a humidity dome or cover your containers with plastic wrap to create a greenhouse effect.
Tips from the Pros
Consider using a heating pad or seedling heat mat to maintain a constant, ideal temperature for sprouting.
Label your containers to keep track of different strains or varieties.
Avoid disturbing the seeds or seedlings unnecessarily during this delicate stage to prevent damage.
With the seeds carefully planted and the right environment set, you'll soon witness the magic of sprouting as your cannabis seedlings emerge from the soil. Be patient, stay attentive, and nurture your young plants with care for a successful start to your indoor or outdoor cannabis cultivation.
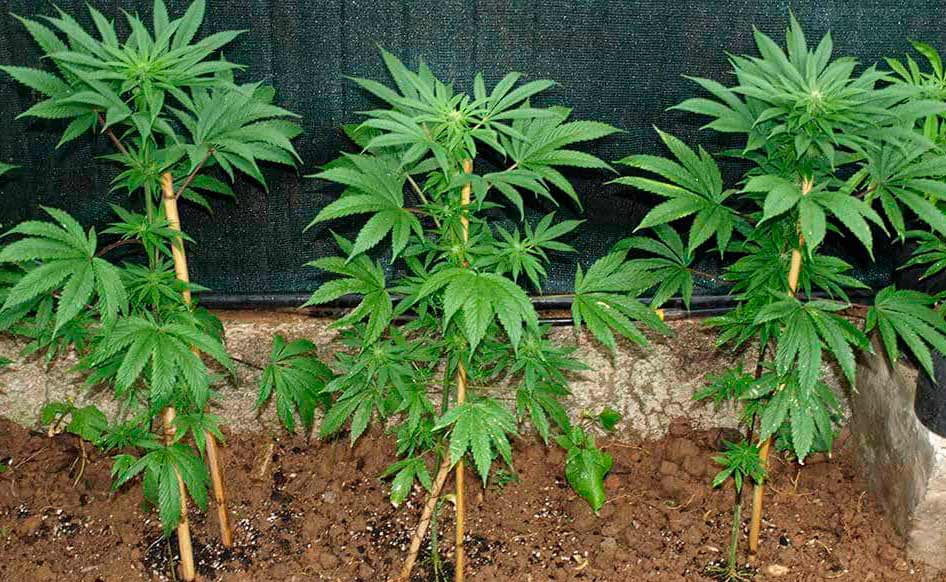
Choosing the Right Container
Choosing the right volume of container for cannabis seeds, whether they are autoflowering or photoperiodic, is crucial to providing the plants with sufficient space for root development and optimal growth. The appropriate container size will vary based on the specific strain, available space, and growing conditions. Below are general recommendations for container sizes for both types of cannabis seeds:
Autoflowering Cannabis Seeds
Autoflowering cannabis plants have a predetermined life cycle, and they automatically transition from the vegetative stage to the flowering stage without being affected by changes in light cycles. They tend to be smaller and have a quicker turnaround time than photoperiodic strains.
For autoflowering seeds, consider the following container sizes:
Solo Cups (3-5 ounces / 100-150 milliliters)
Solo cups are commonly used for germination and early seedling stages. They provide a small space for the young plants and are easy to manage for transplanting.
1 to 3-Gallon Pots (3.8 to 11.4 liters)
As the seedlings grow and develop, transplant them into larger pots to accommodate their expanding root systems. For autoflowering strains, a final container size of 1 to 3 gallons is typically sufficient.
Photoperiodic Cannabis Seeds
Photoperiodic cannabis strains' growth and flowering stages are influenced by changes in light cycles. They tend to be larger and may require more space and time to reach maturity compared to autoflowering strains.
For photoperiodic seeds, consider the following container sizes:
1 to 5-Gallon Pots (3.8 to 18.9 liters)
For young photoperiodic seedlings, start them in smaller pots, such as 1-gallon containers. As they grow, gradually transplant them into larger pots to encourage robust root development and overall plant health.
5 to 20-Gallon Pots (18.9 to 75.7 liters)
For mature photoperiodic plants, larger pots are recommended. A final container size of 5 to 20 gallons will provide ample space for root growth, resulting in larger plants and potentially higher yields.
Tips from the Pros
Ensure that the chosen containers have adequate drainage holes to prevent waterlogging and root rot.
Fabric pots (smartpots) and airpots are an excellent option for cannabis cultivation, as they promote air pruning, preventing root-bound issues and improving nutrient uptake.
Consider your available space and the number of plants you intend to grow when choosing container sizes.
Remember that these are general recommendations, and the actual container size may vary based on the specific strain, growing conditions, and your cultivation goals. Always monitor your plants' growth and adjust container sizes accordingly to ensure optimal results. With the right containers, your cannabis plants will have the space they need to thrive and produce bountiful harvests.
What is a grow box, grow tent and how should they be equipped?
A grow box and a grow tent are both indoor growing setups designed to create a controlled environment for cultivating plants, including cannabis. They offer advantages like privacy, light control, and efficient space utilization, making them popular choices among indoor growers. Let's explore what a grow box and grow tent are, along with essential equipment for each setup.
Grow Box
A grow box, also known as a grow cabinet or stealth box, is a self-contained indoor growing system. It resembles a compact cabinet or box, often made of wood, metal, plastic, or even a cardboard with reflective interiors to maximize light distribution. Grow boxes are designed to be discreet, minimizing odor and sound, making them suitable for growers who require privacy.
Essential Equipment for a Grow Box
Lighting
LED grow lights are the preferred choice for grow boxes due to their low heat output, energy efficiency, and full-spectrum light coverage.
Ventilation
A ventilation system with an intake fan and an exhaust fan is crucial to maintain proper airflow, prevent heat buildup, and control humidity levels.
Carbon Filter
To manage odors effectively, use a carbon filter in conjunction with the exhaust fan to filter and remove unwanted smells.
Growing Medium
Choose a suitable growing medium like soil, coco coir, or hydroponics, depending on your preference and experience.
Nutrients
Provide your plants with the necessary nutrients for healthy growth and development. Choose nutrient solutions tailored to the specific growth stage of your plants.
Hygrometer and Thermometer
Monitoring the temperature and humidity inside the grow box is essential for maintaining optimal conditions.
Timers
Use timers to control the light cycle and ensure consistent photoperiods for your cannabis plants.
Grow Tent
A grow tent is a portable, tent-like structure made of durable fabric with reflective interiors. These tents are easy to set up and dismantle, allowing for flexibility and convenient use. Grow tents are ideal for larger indoor growing projects and are suitable for both beginners and experienced growers.
Essential Equipment for a Grow Tent
Lighting
LED grow lights are also the preferred choice for grow tents due to their energy efficiency and spectrum adjustability.
Ventilation
Similar to grow boxes, a grow tent requires a ventilation system with intake and exhaust fans for proper air circulation and temperature control.
Carbon Filter
Install a carbon filter to eliminate any strong odors that may emanate from the tent.
Growing Medium
Choose the appropriate growing medium that suits your cultivation style and preferences.
Nutrients
Provide your plants with the essential nutrients they need to thrive and flourish.
Hygrometer and Thermometer
Keep track of the temperature and humidity levels inside the grow tent to optimize growing conditions.
Hangers and Straps
Utilize hangers and straps to suspend lighting fixtures, ventilation equipment, and other accessories securely within the tent.
Grow Light Timer
Set up timers to control the light cycle and ensure consistent and accurate lighting schedules.
Both grow boxes and grow tents offer their own advantages, and the choice between the two will depend on your specific requirements, available space, and budget. Regardless of the setup you choose proper equipment, maintenance, and attention to your plants' needs will result in successful and rewarding cannabis cultivation.
What kind of lighting is used to grow cannabis indoors and what is the right distance to the cannabis plant?
Indoor cannabis cultivation relies on artificial lighting to mimic the sun's spectrum and provide the energy needed for plant growth. Light, water, air and soil (nutrients) are the four essential elements needed for cannabis to grow efficiently. The plant converts light energy into chemical fusion through photosynthesis. The plant uses this energy to create new cells. The greater the light intensity, the higher the quality and quantity of the potential yield.
In an outdoor environment, plants receive energy from the sun, but what if a grower decides to cultivate cannabis indoors? The first step is to determine an appropriate source of artificial light. Several types of lighting are commonly used for indoor cannabis cultivation, each with its own advantages and drawbacks.
The most popular options include:
LED Grow Lights
LED (Light Emitting Diode) grow lights have gained popularity in recent years due to their energy efficiency, low heat output, and ability to provide a full spectrum of light suitable for all stages of cannabis growth. They are available in various spectrums, including red, blue and white light, allowing growers to adjust the lighting for different stages of growth.
High Intensity Discharge (HID) Lights
HID lights are a traditional choice for indoor cannabis cultivation. Two common types are Metal Halide (MH) and High-Pressure Sodium (HPS). MH lights emit a blue spectrum that is ideal for the vegetative stage and promotes robust growth and healthy foliage. HPS lights, on the other hand, emit a red-orange spectrum that is perfect for the flowering stage and promotes bud production.
Compact Fluorescent Lights (CFL)
CFL lights are affordable and suitable for small-scale indoor growing or as supplemental lighting. While not as powerful as other options, they can be effective for seedlings, clones or small plants, so-called “dwarves” growing in confined spaces.
Fluorescent Lights
Fluorescent tube lights are similar to CFLs, but in a different form factor. They are excellent for seedlings, clones and early growth stages as they emit less heat and are energy efficient. Moreover. they are efficient for side lighting.
T5 Grow Lights
T5 grow lights are specialized fluorescent tubes designed to provide high-intensity lighting suitable for cannabis seedlings and young plants.
The Right Distance to Cannabis Plants
The distance between the grow lights and cannabis plants, often referred to as the "light distance" or "light height," is crucial for successful cultivation. The appropriate distance depends on the type of light, its intensity, and the growth stage of the plants.
Seedlings and Clones
During the seedling and clone stage, cannabis plants are delicate and more sensitive to intense light. For LED grow lights or fluorescent lights, maintain a distance of about 24-36 inches (60-90 centimeters) to prevent light burn and encourage healthy growth.
Vegetative Stage
As the plants grow and enter the vegetative stage, you can gradually lower the lights to approximately 18-24 inches (45-60 centimeters) for LED grow lights and 12-18 inches (30-45 centimeters) for HID lights.
Flowering Stage
During the flowering stage, when cannabis plants require more intense light to support bud development, you can further lower the lights. For LED grow lights, aim for a distance of around 12-18 inches (30-45 centimeters), and for HID lights, maintain a distance of about 10 to 16 inches (25 to 40 centimeters).
Always monitor your plants closely and adjust the light distance as needed. If you notice signs of light stress (e.g., leaves curling, yellowing, or bleaching), increase the distance between the lights and the plants to prevent damage. Finding the right balance between light intensity and distance will contribute to healthy, productive cannabis growth indoors.
Why ventilation is so important when growing cannabis indoors?
Ventilation is of paramount importance when growing cannabis indoors due to several key reasons. Proper ventilation helps create an optimal environment for cannabis plants, ensuring their health, growth, and overall success. Here are the main reasons why ventilation is crucial for indoor cannabis cultivation:
Air Exchange and CO2 Levels
Ventilation provides a steady supply of fresh air and carbon dioxide (CO2) to the plants. During the process of photosynthesis, cannabis plants absorb CO2 and convert it into essential sugars and oxygen. Sufficient CO2 levels are critical for vigorous growth and optimal yields. Proper ventilation ensures a continuous exchange of stale air (low in CO2) with fresh air (rich in CO2), promoting healthy photosynthesis and plant development.
Temperature Control
Indoor cannabis gardens can generate significant heat from grow lights and other equipment. Without proper ventilation, excess heat can accumulate, leading to stress on the plants, reduced growth, and potential damage. A well-ventilated space helps dissipate heat, maintaining a stable and suitable temperature range for the plants' needs.
Humidity Regulation
Indoor growing environments can become humid, especially during the vegetative and flowering stages when cannabis plants transpire more actively. High humidity levels create an environment conducive to mold, mildew, and other fungal issues that can harm the plants. Proper ventilation aids in reducing humidity by expelling moist air and introducing drier air, helping to prevent moisture-related problems.
Odor Control
Cannabis plants emit strong and distinct odors, particularly during the flowering stage. Ventilation, along with the use of carbon filters, helps manage and remove these odors from the indoor space. This is crucial for growers who need to maintain discretion and avoid potential issues with neighbors or legal authorities.
Air Circulation and Strengthening Plants
Effective ventilation ensures proper air circulation within the grow space. Air movement strengthens the plant's stems and branches, helping them to support the weight of dense buds during the flowering stage. Additionally, good air circulation reduces the risk of stagnant air pockets, which can lead to the development of pests and diseases.
Preventing Pests and Diseases
Stagnant air, high humidity, and poor ventilation can create an environment favorable to pests and diseases. Adequate ventilation helps reduce the risk of infestations and keeps the growing environment less hospitable to pests and pathogens.
CO2 Enrichment
In some advanced indoor growing setups, growers use CO2 enrichment systems to increase CO2 levels beyond atmospheric concentrations. In such cases, proper ventilation ensures that the enriched CO2 is effectively distributed throughout the growing space, maximizing its benefits.
Overall, ventilation is a critical component of any indoor cannabis cultivation system. By providing fresh air, controlling temperature and humidity, and eliminating odors, proper ventilation fosters a healthy and thriving environment for cannabis plants, ultimately leading to successful yields and high-quality crops.
What is the right type of ventilation should be installed for growing cannabis indoors?
Proper ventilation is essential for a successful indoor cannabis cultivation setup. It ensures fresh air exchange, controls temperature and humidity levels, and helps prevent issues like mold, mildew, and pests. The right type of ventilation system for growing cannabis indoors should consist of both intake and exhaust fans, along with other components to maintain a healthy environment for your plants. Here's a breakdown of the key components:
Intake Fan
The intake fan is responsible for drawing fresh, clean air from outside the growing space into the indoor garden. It brings in the necessary carbon dioxide (CO2) required for photosynthesis and promotes healthy plant growth. To ensure efficiency, position the intake fan near the bottom of the grow area, preferably at the opposite end from the exhaust fan, to create effective air circulation.
Exhaust Fan
The exhaust fan is crucial for removing stale air, excess heat, and humidity from the grow space. It aids in preventing heat buildup and maintaining a consistent temperature. The exhaust fan should be positioned near the top of the grow area to effectively remove warm air, and it should be paired with a carbon filter to manage any strong odors produced by the cannabis plants.
Carbon Filter
A carbon filter is an essential component of the ventilation system when growing cannabis indoors. It helps eliminate unwanted odors produced during the flowering stage, ensuring discretion and minimizing potential issues with neighbors or law enforcement. The carbon filter is typically attached to the exhaust fan, with the air passing through the filter before exiting the grow space.
Ducting
Ducting is used to connect the intake and exhaust fans to the grow space. It allows for efficient airflow, carrying fresh air in and stale air out. Flexible or rigid ducting can be used, depending on the layout of your indoor garden.
Fan Speed Controller
To fine-tune the airflow, especially in situations where the fans might be too powerful, a fan speed controller can be installed. This allows you to adjust the fan's speed and airflow rate, ensuring optimal conditions for your cannabis plants.
Oscillating Fans
In addition to the intake and exhaust fans, oscillating fans can be placed inside the grow space to enhance air circulation. These fans help prevent stagnant air pockets, ensuring that the entire plant canopy receives fresh air and light, which helps strengthen the plants and reduce the risk of mold or pests.
Remember, maintaining proper ventilation is crucial throughout all growth stages of your cannabis plants. Regularly monitor the temperature, humidity, and airflow to ensure your plants thrive and produce healthy yields. Adequate ventilation contributes to a successful indoor cannabis cultivation experience and provides your plants with the optimal environment they need to flourish.
How to calculate the power of the ventilation system for the grow box?
Calculating the power of the ventilation system for your grow box involves considering several factors, such as the size of the grow box, the amount of heat generated by the lighting and equipment, and the desired air exchange rate. The goal is to ensure adequate ventilation to maintain the right temperature, humidity, and CO2 levels for healthy cannabis plant growth. Follow these steps to calculate the power of the ventilation system for your grow box:
Determine the Grow Box Size
Measure the dimensions of your grow box to calculate its volume. Multiply the length, width, and height of the grow box in feet (or meters) to obtain the total volume in cubic feet (or cubic meters).
Determine the Air Exchange Rate
The recommended air exchange rate for a grow box is typically 20 to 30 times per hour. This means the entire volume of the grow box should be exchanged with fresh air 20 to 30 times in one hour.
Calculate the Required Airflow
To calculate the required airflow, multiply the total volume of the grow box by the desired air exchange rate:
Required Airflow (CFM or cubic feet per minute) = Volume of Grow Box (cubic feet) x Air Exchange Rate
For example, if your grow box has a volume of 50 cubic feet, and you aim for an air exchange rate of 20 times per hour, the required airflow would be:
Required Airflow = 50 cubic feet x 20 exchanges per hour = 1000 CFM
Account for Heat Load
Consider the amount of heat generated by grow lights and other equipment inside the grow box. This heat load will impact the temperature inside the grow space. Some lights, like HID lights, generate more heat than others, such as LED lights. Choose an exhaust fan that can handle the heat load and efficiently remove excess heat from the grow box.
Choose the Appropriate Exhaust Fan
Select an exhaust fan with a CFM rating that matches or exceeds the calculated required airflow. It's better to slightly oversize the exhaust fan to ensure efficient ventilation.
Choose the Appropriate Intake Fan
For efficient airflow, the intake fan's CFM should roughly match the exhaust fan's CFM. This balanced airflow ensures that fresh air is drawn into the grow box evenly, and negative pressure is minimized.
Consider Adding a Carbon Filter
If your grow box produces strong odors during the flowering stage, consider adding a carbon filter to the exhaust fan to manage and eliminate unwanted smells.
Keep in mind that these calculations provide a basic guideline for determining the power of the ventilation system. Depending on your specific grow box setup, environmental conditions, and equipment, you may need to adjust the ventilation system accordingly. Proper ventilation is crucial for maintaining a healthy growing environment and maximizing the potential of your cannabis plants.
Odor in a grow box. How to combat it?
Combatting odor in a grow box is essential to maintain discretion and prevent any potential issues with neighbors or legal authorities. Cannabis plants can emit strong and distinct odors, particularly during the flowering stage. Fortunately, there are several effective methods to manage and eliminate unwanted smells in your grow box. Here are some strategies to combat odor:
Carbon Filters
One of the most effective ways to combat odor is by using carbon filters. Attach a high-quality carbon filter to the exhaust fan in your grow box. As the air is pulled out of the grow box, it passes through the carbon filter, which effectively traps and neutralizes odorous particles. Carbon filters are widely available and come in various sizes to accommodate different exhaust fan setups.
Exhaust Fan Placement
Ensure that the exhaust fan is positioned correctly within the grow box. Placing it near the top of the grow box allows it to efficiently remove warm, humid air, and odors that tend to rise. This helps in the effective removal of odor from the grow space.
Air Purifiers
Consider using air purifiers equipped with activated carbon or other odor-eliminating technology. Air purifiers help to further clean the air inside the grow box, reducing the presence of odors and particulates.
Negative Pressure Setup
Create a negative pressure environment inside the grow box by ensuring that the exhaust fan has a higher CFM (cubic feet per minute) rating than the intake fan. This means more air is pulled out of the grow box than is drawn in, further reducing the likelihood of odors escaping.
Seal Gaps and Vents
Inspect the grow box for any gaps, vents, or openings where odor might escape. Seal these areas with weather-stripping or appropriate sealants to prevent odor leakage.
Odor Neutralizers
Use odor-neutralizing products specifically designed for cannabis growers. These products help mask and neutralize odors, but keep in mind that they are not as effective as carbon filters in eliminating strong odors.
Air Fresheners and Ventilation
In addition to using carbon filters, you can also use natural or mild air fresheners outside the grow box to help cover any residual odors. Proper ventilation with fresh air also helps dilute any escaping odors.
Strategic Timing
If discretion is a top priority, consider timing your grow to coincide with cooler weather when you can keep windows and doors closed. Cooler temperatures may reduce the need for constant ventilation, minimizing the chance of odors escaping.
Remember, while these strategies can help control odor in a grow box, nothing is entirely foolproof. It's crucial to remain vigilant and continuously monitor the odor levels inside and outside the grow box. Regular maintenance, proper ventilation, and the use of carbon filters are key components of an effective odor control strategy for indoor cannabis cultivation.
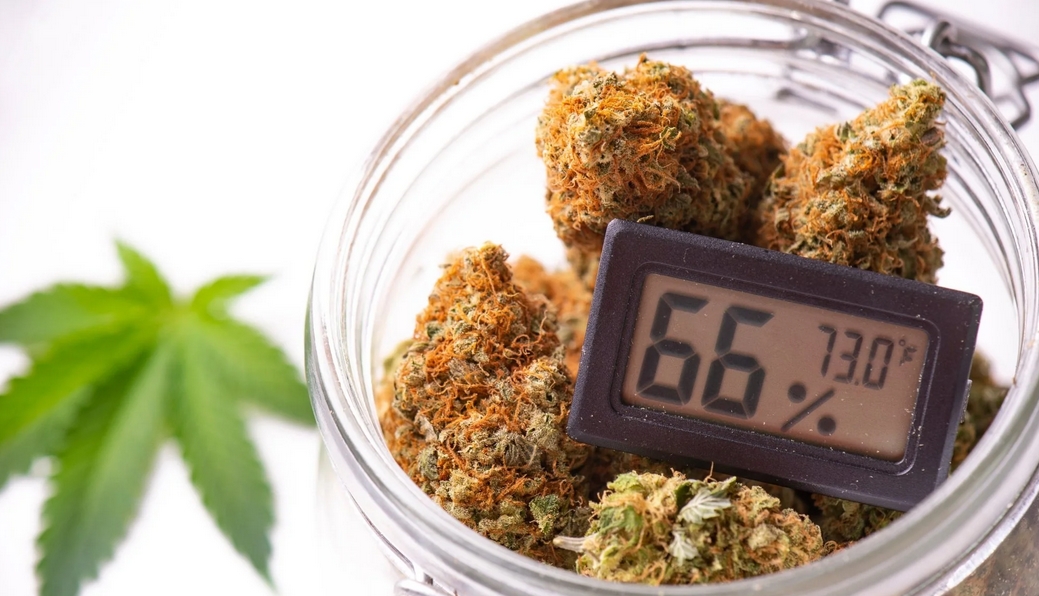
How to maintain humidity in a grow box?
Maintaining the right humidity level in a grow box is crucial for successful cannabis cultivation. Cannabis plants have specific humidity requirements during different growth stages. Proper humidity control ensures healthy growth, reduces the risk of mold and pests, and helps optimize plant development. Here are some strategies to maintain humidity in your grow box:
Monitor Humidity Levels
Invest in a reliable hygrometer to measure the humidity inside your grow box accurately. Monitoring humidity regularly allows you to adjust your strategies as needed to maintain optimal levels.
Use a Humidifier
If the humidity levels are too low, especially during the vegetative stage when plants prefer higher humidity, consider using a humidifier. Humidifiers add moisture to the air and help raise humidity levels to the desired range.
Humidity Domes
For seedlings and young plants, consider using humidity domes or clear plastic covers. Humidity domes create a mini-greenhouse effect, trapping moisture and raising humidity around the plants. As the seedlings grow, gradually remove the domes to acclimate them to lower humidity levels.
Misting
Misting the leaves of the cannabis plants with water can temporarily raise humidity levels. However, avoid over-misting, as excessive moisture can lead to mold or mildew issues.
Water Trays
Place shallow water trays or containers filled with water near the plants. As the water evaporates, it increases humidity levels within the grow box. Be cautious not to place the water containers too close to the plants to avoid overwatering.
Humidity Packs or Boveda Packs
Consider using humidity packs, such as Boveda packs, which are designed to regulate humidity levels. These packs can help stabilize humidity within the desired range.
Exhaust Fan Speed Control
If humidity levels are consistently too high, you can adjust the exhaust fan's speed to increase the rate of air exchange and lower humidity.
Dehumidifier (Optional)
In situations where humidity levels are persistently high and difficult to control using other methods, you may consider using a dehumidifier. Dehumidifiers remove excess moisture from the air, helping to reduce humidity to the desired range.
Proper Watering Practices
Overwatering can increase humidity levels inside the grow box. Be mindful of your watering schedule and ensure the plants receive the right amount of water without causing excessive moisture in the grow environment.
Remember that the ideal humidity levels vary based on the growth stage of your cannabis plants. In general, humidity levels around 40-60% during the vegetative stage and slightly lower (30-50%) during the flowering stage are appropriate for most cannabis strains. By using these strategies and staying vigilant, you can maintain the right humidity levels in your grow box to support healthy and vigorous cannabis growth.
What is the right medium for growing cannabis?
The right medium for growing cannabis depends on various factors, including the grower's experience, cultivation goals, and the specific needs of the cannabis plants. There are several popular growing mediums to choose from, each with its advantages and considerations. Here are some common options for growing cannabis:
Soil
Soil is the traditional and widely used medium for growing cannabis. It provides a natural and forgiving environment for the plants, making it an excellent choice for beginners. High-quality organic soil mixes contain essential nutrients and beneficial microorganisms that support plant growth. Soil also retains moisture well, reducing the frequency of watering. Cannabis plants grown in soil tend to develop a complex flavor profile, making it a preferred medium for some connoisseur growers.
Coco Coir
Coco coir is a popular soilless medium made from coconut fiber. It offers excellent water retention and aeration, promoting healthy root development and growth. Coco coir is pH neutral and can be used in hydroponic systems or as a standalone medium with nutrient-rich amendments. It provides a balance between the control of hydroponics and the forgiving nature of soil, making it a favorite among both novice and experienced growers.
Hydroponics
Hydroponics is a soilless method of growing cannabis where plants are grown in a nutrient-rich water solution. This method allows for precise control over nutrient delivery and pH levels, which can result in faster growth and potentially higher yields. Hydroponic systems include Deep Water Culture (DWC), Nutrient Film Technique (NFT), and Ebb and Flow systems. Hydroponics requires more attention to detail and monitoring of nutrient levels, making it better suited for experienced growers.
Aeroponics
Aeroponics is an advanced soilless method where cannabis plants are suspended in air, and the roots are misted with a nutrient solution. This technique offers superior oxygenation to the roots, promoting rapid growth and potentially increased yields. However, aeroponics is a more challenging and demanding method of cultivation, best suited for experienced growers who can closely monitor and control the growing environment.
Rockwool and Other Grow Media
Rockwool and other grow media, such as clay pebbles (hydroton), perlite, and vermiculite, are commonly used in hydroponic systems. These inert materials provide a stable support structure for the roots and allow for excellent aeration and drainage. Rockwool cubes are often used as seedling starters before transplanting to a larger system.
Ultimately, the right medium for growing cannabis depends on your specific needs, resources, and level of expertise. Whether you choose soil, coco coir, hydroponics, or aeroponics, providing your cannabis plants with the proper nutrients, light, and environmental conditions is crucial for successful cultivation. Experimenting with different mediums can help you find the approach that best suits your growing style and results in healthy, thriving cannabis plants.
What is supersoil? How to make it according to Subcool's recipe?
Supersoil is a nutrient-rich, pre-amended soil mixture designed to provide all the essential nutrients needed for the entire cannabis plant's life cycle. It is a popular choice among organic growers who prefer a simpler approach to nutrient management. Subcool, a well-known cannabis breeder and cultivator, developed a famous recipe for creating supersoil that has been widely adopted by the cannabis growing community. Here's a general outline of how to make Subcool's Supersoil:
Ingredients:
(Note: The following quantities are approximate measurements. You can adjust the recipe based on your preferences and availability of ingredients)
Base Soil Mix:
50% High-Quality Organic Potting Soil (10 liters)
30% Perlite or Pumice (6 liters) - For aeration and drainage
1 tablespoon Mycorrhizal Fungi - Boosts root development and nutrient absorption
Instructions:
In a large container or wheelbarrow, mix the base soil ingredients together thoroughly: organic potting soil, perlite or pumice, and earthworm castings. This forms the foundation of your supersoil.
Gradually add each amendment and nutrient one by one, mixing well after each addition. Ensure the mixture is thoroughly blended to distribute the nutrients evenly.
After all the ingredients are mixed, moisten the soil with water until it reaches the consistency of a wrung-out sponge. This helps activate the beneficial microorganisms and allows the amendments to blend together.
Place the moistened supersoil mixture into 20-liter containers, fabric pots, or directly into your grow space, depending on your preference and setup.
Allow the supersoil to "cook" or mature for at least 4 to 6 weeks before planting your cannabis. During this time, the microbial life in the soil will become active, and the nutrients will break down, creating a rich and fertile environment for your plants.
When planting, simply place your cannabis seedlings or clones directly into the supersoil. Water as needed, but avoid overwatering, as supersoil tends to retain moisture well.
Subcool's Super Soil recipe is a popular and effective way to create a nutrient-rich and balanced growing medium for your cannabis plants. It's essential to follow the instructions carefully and give the soil ample time to mature before using it for cultivation. With proper care and attention, your supersoil will provide the necessary nutrients and microbial support for healthy and thriving cannabis plants.
Important Note:
Always check the pH of the soil before planting to ensure it falls within the appropriate range for cannabis cultivation (around 6.0 to 6.5).
Remember that Subcool's Supersoil is just one of many Super Soil recipes available. Feel free to experiment and adjust the recipe to suit your specific growing needs and preferences.
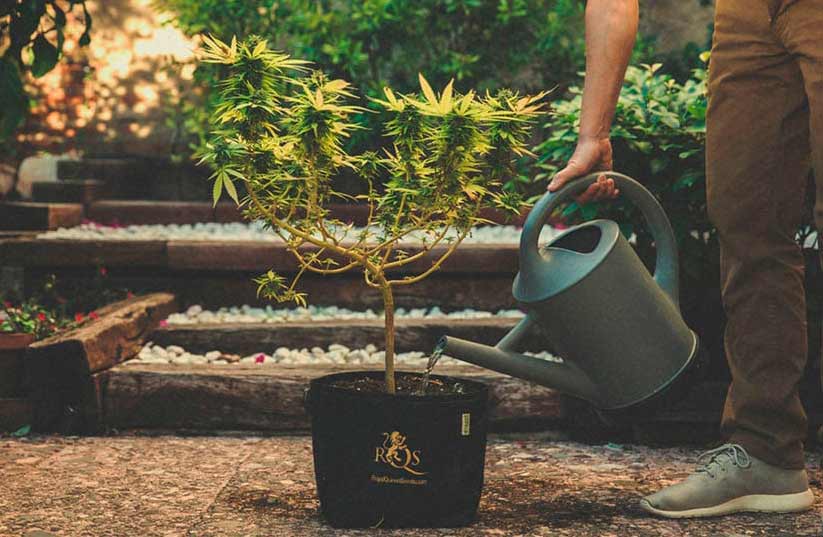
What is the correct schedule for watering cannabis plants?
The correct watering schedule for cannabis plants can vary based on various factors, including the growing medium, container size, environmental conditions, and the stage of plant growth. It is essential to develop a watering routine that suits your specific setup and the needs of your cannabis plants. Here are some general guidelines to help you establish a proper watering schedule:
Observe the Plants
Pay close attention to your cannabis plants and monitor their water needs. Observing the plants will help you understand when they are thirsty and when they have had enough water.
Check Soil Moisture
Before watering, check the moisture level of the soil. Stick your finger about an inch or two into the growing medium (soil or coco coir). If it feels dry at that depth, it's time to water. If it feels moist, hold off on watering until it becomes slightly dry.
Avoid Overwatering
Overwatering is a common mistake that can lead to root rot and other issues. Allow the top layer of the soil to dry out before watering again. Cannabis plants prefer well-draining soil, so ensure your containers have adequate drainage holes to prevent waterlogging.
Consider Pot Size
The size of the pot also affects the watering schedule. Smaller pots dry out more quickly, while larger pots retain moisture for a longer duration. Adjust your watering frequency accordingly.
Environmental Conditions
Factors such as temperature, humidity, and airflow influence the rate at which plants transpire and use water. Hotter and drier conditions may require more frequent watering, while cooler and more humid conditions may necessitate less frequent watering.
Stage of Growth
The watering needs of cannabis plants change during different growth stages. Seedlings and young plants have smaller root systems and may require less water. As the plants mature and their root systems develop, they will need more water. Additionally, during the flowering stage, some growers opt to reduce watering slightly to promote bud development.
Watering Techniques
When watering, use a gentle and even stream of water to avoid disturbing the soil and roots. Water until you see a small amount of runoff at the bottom of the container, ensuring thorough saturation of the growing medium.
Train Plants to Search for Water
To encourage root growth, water the plants slightly further away from the stem as they mature. This practice will encourage the roots to spread out in search of water, promoting a more robust root system.
Maintain Consistency
Once you find a watering schedule that works well for your plants, try to maintain consistency. Consistent watering helps promote stable growth and prevents stress on the plants.
Remember that these are general guidelines, and individual plant needs may vary. As you gain experience with your specific growing environment, you'll develop a better sense of when and how much to water your cannabis plants. Regularly monitoring your plants' health and adjusting your watering schedule as necessary will contribute to successful cannabis cultivation.
When is the right time to apply fertilizer when growing cannabis?
The right time to apply fertilizer when growing cannabis depends on the stage of the plant's growth and the type of fertilizer you are using. Cannabis has different nutrient requirements during various growth phases, and providing the right nutrients at the appropriate times is crucial for healthy development and optimal yields. Here's a general guideline for when to apply fertilizer during each growth stage:
Seedling Stage
During the seedling stage, which typically lasts for the first few weeks after germination, cannabis plants rely on the nutrients stored in the seed's cotyledons and initial taproot. They generally don't require additional fertilizers during this stage. Use a light nutrient solution with a low concentration of nutrients if needed.
Vegetative Stage
Once the seedlings develop their first true leaves and start growing more vigorously, they enter the vegetative stage. This phase focuses on vegetative growth, where the plant develops its foliage and stems. During the vegetative stage, cannabis plants require higher levels of nitrogen to support leafy growth. Start using a balanced N-P-K (nitrogen-phosphorus-potassium) fertilizer with a higher nitrogen content, such as a ratio of 3-1-2 or 4-1-2, during this stage.
Pre-Flowering and Transition Stage
As cannabis plants mature and prepare to enter the flowering stage, they undergo a pre-flowering and transition phase. During this time, you can gradually reduce the nitrogen levels in the fertilizer and increase phosphorus and potassium. A fertilizer with a balanced N-P-K ratio of 1-2-2 or similar is suitable for this phase.
Flowering Stage
The flowering stage is when cannabis plants focus on bud development. They require higher levels of phosphorus and potassium during this phase. Switch to a bloom or flowering-specific fertilizer with an N-P-K ratio that emphasizes higher phosphorus and potassium content, such as 1-4-4, 1-3-6, or similar.
Late Flowering Stage
As the flowering stage progresses and the buds mature, cannabis plants will require less nitrogen and may need slightly more potassium. Continue using a bloom-specific fertilizer, but consider reducing the nitrogen content further to promote better bud development.
Flushing
In the final weeks of the flowering stage, before harvest, it is essential to flush the plants with plain, pH-balanced water. Flushing helps remove any excess nutrients and salts from the growing medium, improving the taste and quality of the final product.
When cultivating photoperiodic cannabis strains, it is up to the grower to decide what type of fertilizer to use. Using a high nutrient soil will be sufficient for the vegetative stage of growth, but the flowering stage will require specific fertilizers. You can use organic fertilizers or buy mineral fertilizers for flowering.
Currently, there are a number of fertilizer manufacturers that offer comprehensive cannabis nutrients. These nutes are sold in different containers: one for vegetative growth and one for the flowering stage. There is no need to experiment with them, it is better to strictly follow the instructions. However, you should always keep in mind that manufacturers slightly exceed the dosage in order to increase the sales of their products on the market.
When growing cannabis in coco coir or poor soil, nutrients can be applied after 2-4 weeks of growth. Apply fertilizer on a schedule and alternate with pH-balanced water irrigation.
Remember, overfeeding can lead to nutrient imbalances, nutrient lockout, and plant stress. Always use pH and ppm (EC) meters. It's crucial to understand your cannabis plant's nutrient requirements at each growth stage and adjust your fertilizer application accordingly. Regularly monitoring your plants' health and appearance will help you identify any nutrient deficiencies or excesses and make timely adjustments to ensure successful cannabis cultivation.
What are the most commonly practiced cannabis trainings?
Cannabis training techniques are used to manipulate the growth and shape of cannabis plants, optimizing yields, light distribution, and overall plant health. By training cannabis plants, growers can encourage more even canopy development, increase bud sites, and improve airflow, resulting in more robust and productive crops. Several cannabis training methods are commonly practiced, each offering unique benefits. Here are some of the most popular cannabis training techniques:
Topping
Topping involves removing the top growth (apical meristem) of the main stem, typically during the vegetative stage. This encourages the plant to develop multiple main colas and lateral branches, resulting in a bushier and more even canopy. Topping can increase yields by allowing more light penetration and promoting the growth of additional colas.
FIMming
FIMming is a similar technique to topping, but instead of removing the entire top, you pinch or cut off a portion of the apical meristem. The term "FIM" stands for "F***, I Missed," as it was originally an accidental variation of topping. FIMming stimulates the growth of multiple colas and side branches, but it is generally less stressful for the plant compared to topping.
LST (Low-Stress Training)
LST involves gently bending and tying down branches to create a more horizontal and even canopy. By spreading out the branches, LST ensures that more bud sites receive direct light, resulting in increased yields and more uniform growth. LST is a non-invasive method that minimizes stress on the plant.
Main-Lining (Manifolding)
Main-lining is a high-stress training technique that involves creating a symmetrical structure of the plant with multiple evenly spaced main colas. This is achieved by topping the main stem repeatedly and training the resulting branches horizontally. Main-lining ensures an even canopy and maximizes light exposure to all bud sites.
ScrOG (Screen of Green)
The ScrOG method involves placing a screen or net above the plants and weaving the branches through it as they grow. The screen helps support the branches, creating an even canopy and encouraging the plants to develop more bud sites. ScrOG maximizes light distribution and is especially useful for indoor growers with limited vertical space.
Super Cropping
Super cropping is a high-stress training technique that involves gently crushing or pinching the stems to create controlled stress points. This process strengthens the branches and encourages lateral growth, resulting in a sturdier plant structure with increased bud sites.
Defoliation
Defoliation involves the selective removal of fan leaves from the plant. When done strategically during the flowering stage, defoliation can improve light penetration, airflow, and bud development. However, it should be performed with caution to avoid excessive stress.
These training techniques are not mutually exclusive, and some growers may use a combination of methods to achieve their desired results. When practicing cannabis training, it's essential to be patient and observant, adjusting your approach as the plant responds. Additionally, not all cannabis strains respond the same way to training, so understanding the specific needs and characteristics of your chosen strain will help you determine the most suitable training techniques for your grow.
How long does it take for cannabis to grow?
The time it takes for cannabis to grow from seed to harvest can vary significantly based on several factors, including the strain, growing conditions, and the desired maturity of the plants. On average, cannabis plants go through several distinct stages of growth, each with its timeline. Here's a general overview of the time it takes for cannabis to grow:
Germination Stage
This is the initial stage where the cannabis seed sprouts and develops into a seedling. Germination usually takes 1 to 7 days, depending on factors like seed quality, temperature, and moisture levels.
Seedling Stage
After germination, the seedling stage begins. This phase typically lasts for 2 to 3 weeks, during which the plant develops its first set of true leaves and starts to establish its root system.
Vegetative Stage
The vegetative stage is when the cannabis plant experiences rapid growth in foliage and stems. This stage can last anywhere from 3 weeks to several months, depending on the desired plant size and the strain's growth characteristics.
Pre-Flowering and Transition Stage
Towards the end of the vegetative stage, cannabis plants undergo a pre-flowering and transition phase as they prepare to enter the flowering stage. This stage can last about 1 to 2 weeks, during which the plant shows signs of sexual maturity.
Flowering Stage
The flowering stage is when the cannabis plants start to produce flowers (buds). The duration of the flowering stage varies depending on the strain, but it typically lasts 6 to 12 weeks. Some strains may have shorter flowering times, while others can take longer to reach maturity.
Late Flowering and Ripening Stage
In the final weeks of the flowering stage, the buds continue to develop and ripen. The trichomes on the buds change from clear to cloudy and, in some cases, amber, indicating the right time for harvest.
Harvest
Once the buds have reached their desired level of ripeness and potency, it's time for harvest. Harvest time can vary depending on the desired effects of the strain. Some growers harvest early for a more cerebral high, while others wait for more pronounced relaxing effects.
In total, from the time of germination to harvest, cannabis plants can take anywhere from 8 weeks for some fast-flowering strains to 6 or more months for longer-flowering strains. Autoflowering strains generally have a shorter life cycle compared to photoperiod strains, as they automatically transition from vegetative growth to flowering without relying on light schedules.
Keep in mind that these timeframes are general estimates, and the actual growth time may vary based on environmental factors, growing techniques, and the specific genetics of the cannabis strain.
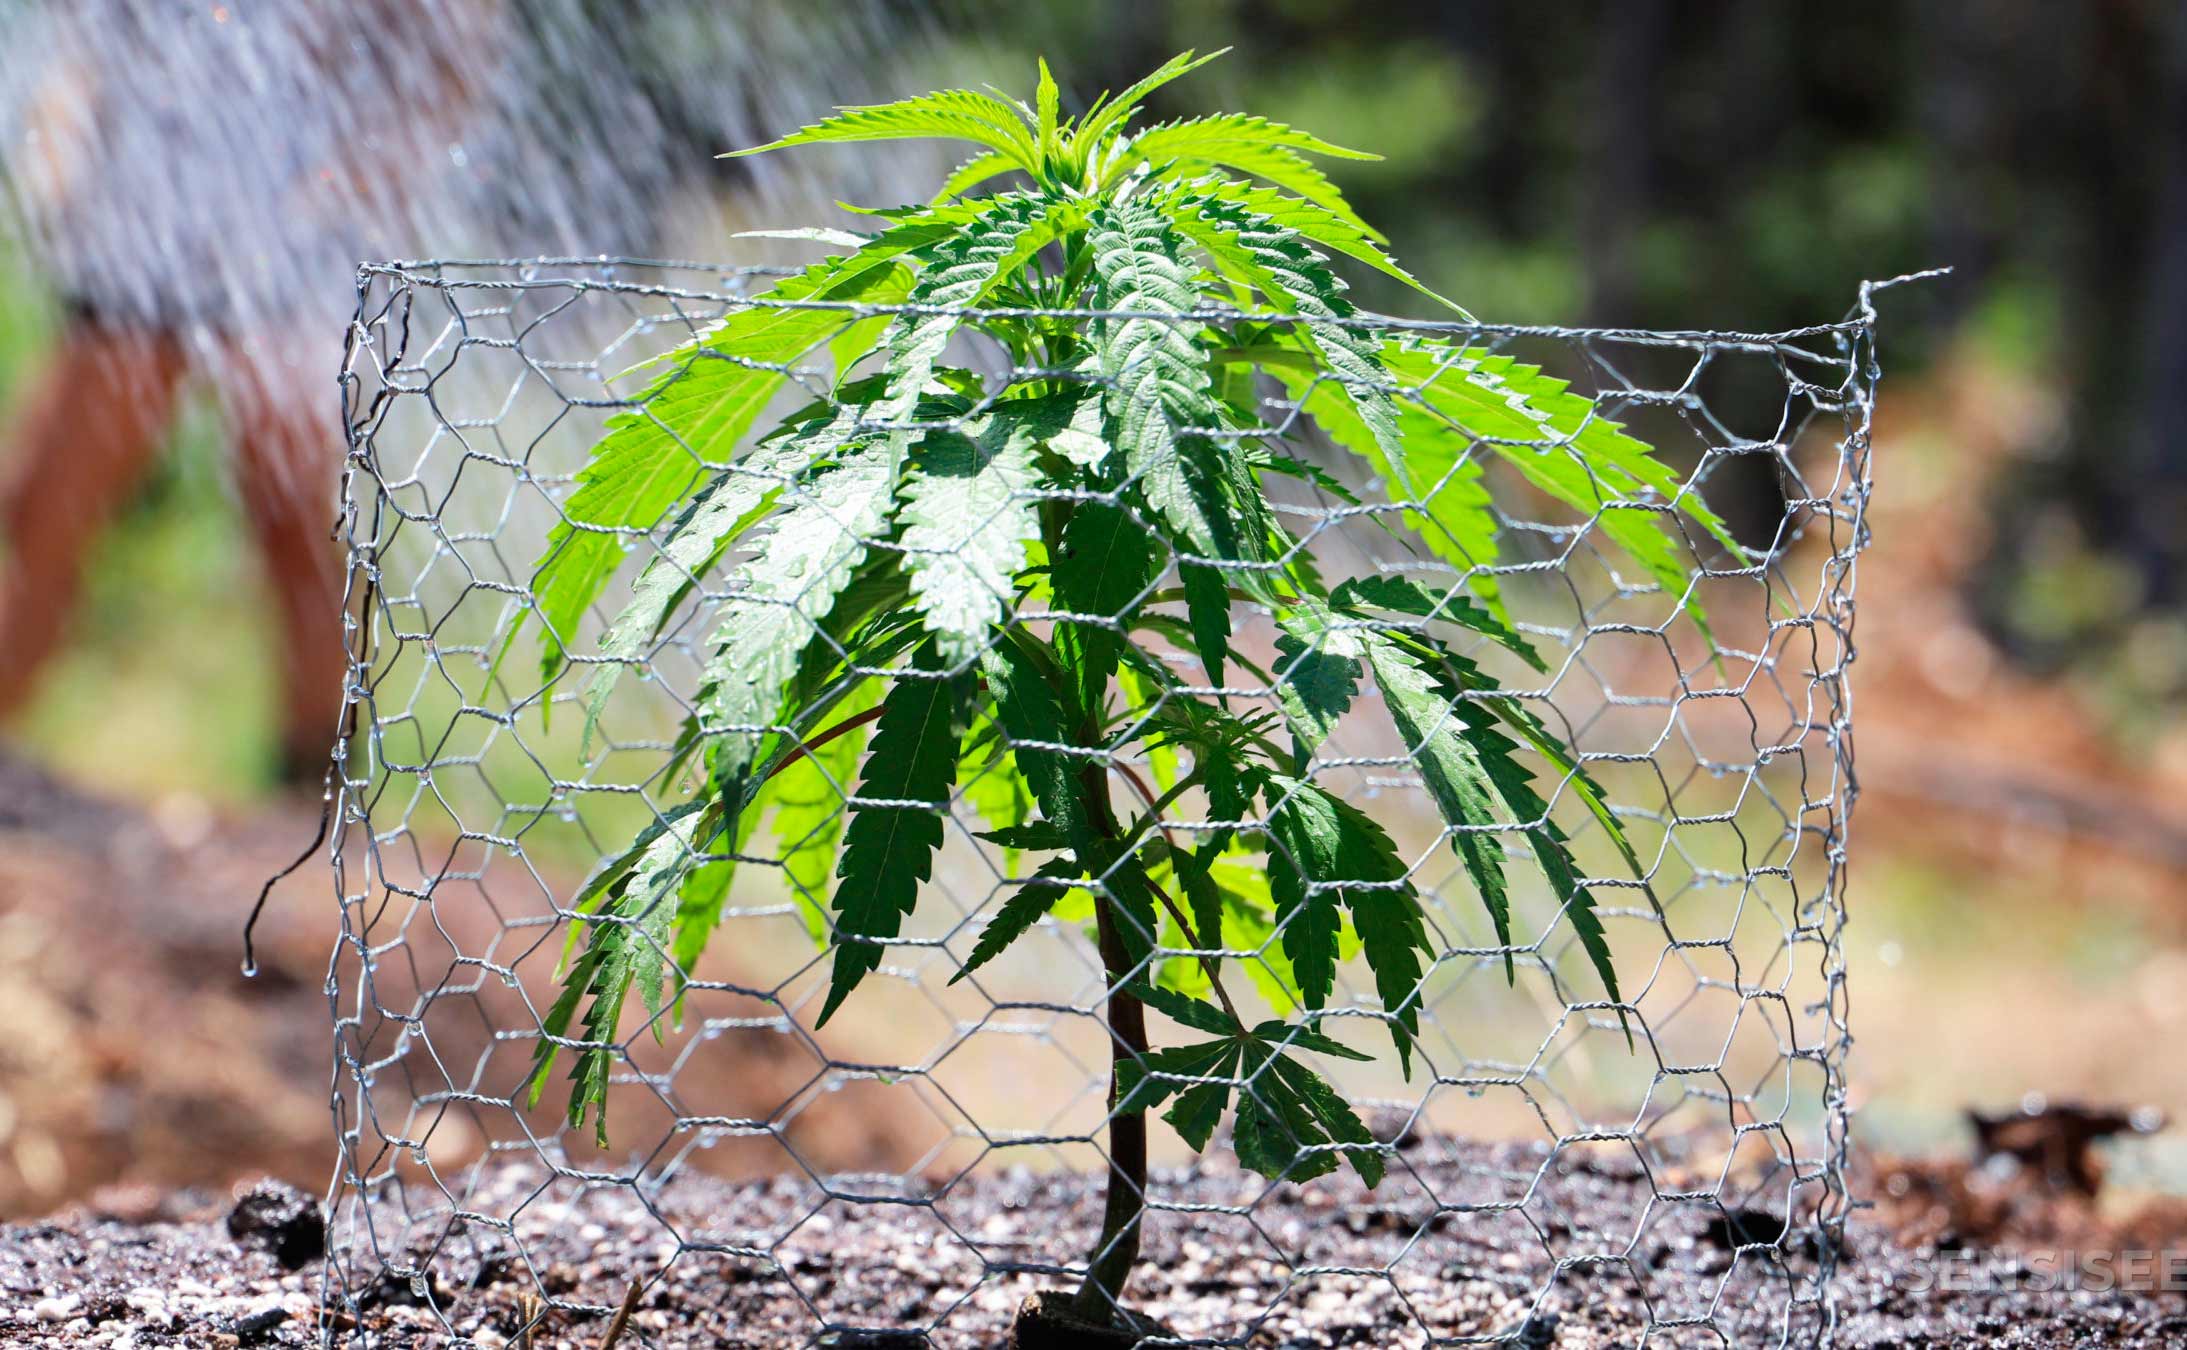
What are the specifics and challenges of outdoor cannabis cultivation?
Outdoor cannabis cultivation offers various advantages, such as natural sunlight, larger plant sizes, and potentially higher yields. However, it also comes with specific challenges that growers need to address for a successful harvest. Here are the specifics and challenges of outdoor cannabis cultivation:
Specifics
Natural Sunlight. Outdoor cannabis plants receive natural sunlight, providing a full spectrum of light that can enhance plant growth and cannabinoid production.
Larger Plant Size. With more space to grow, outdoor cannabis plants can reach larger sizes compared to indoor cultivation.
Cost Savings. Outdoor growing reduces the need for expensive artificial lighting and climate control equipment, potentially lowering operational costs.
Terroir Influence. Outdoor cultivation allows cannabis plants to express unique terroir characteristics based on the local climate, soil composition, and environmental factors.
Eco-Friendly. Outdoor growing typically has a lower carbon footprint compared to indoor cultivation due to reduced energy consumption.
Natural Environment. Growing cannabis outdoors allows plants to interact with the natural ecosystem, fostering a more symbiotic relationship with beneficial insects and microorganisms.
Challenges
Climate Control. Outdoor growers are at the mercy of weather conditions, which can be unpredictable and extreme. Heatwaves, heavy rains, and early frosts can negatively impact plant health and yields.
Pest and Disease Pressure. Outdoor cannabis plants are more vulnerable to pests and diseases. Insects, rodents, and other animals can damage or consume plants, while diseases can spread quickly in open environments.
Security and Theft. Outdoor cannabis gardens are more exposed and can attract unwanted attention. Theft and trespassing are significant concerns, especially in regions with legal restrictions.
Environmental Impact. Outdoor cultivation can have a larger environmental impact, especially if growers use harmful chemicals or improper waste disposal practices.
Timing and Photoperiod. Outdoor growers must carefully time their planting to ensure plants have sufficient time to mature before adverse weather or shorter daylight periods occur.
Genetics and Strain Selection. Choosing the right cannabis strains that are suited to the specific climate and environmental conditions is crucial for outdoor success.
Contamination Risk. Outdoor plants can be exposed to potential contamination from pollutants, pesticides, or neighboring crops.
Lack of Control. Unlike indoor cultivation, growers have limited control over the growing environment, making it more challenging to manipulate certain aspects of plant development.
Legal Restrictions. Outdoor cultivation may not be legal in all regions, and growers must adhere to local laws and regulations to avoid legal repercussions.
To overcome these challenges, outdoor growers must conduct thorough planning, stay vigilant in monitoring plant health, and implement sustainable and responsible growing practices. By being adaptable and responsive to the unique demands of outdoor growing, cannabis cultivators can maximize their chances of a successful and rewarding harvest.
What are the best cannabis strains to grow outdoors?
The best cannabis strains to grow outdoors are those that are well-suited for the specific climate and growing conditions of your region. Different strains have varying characteristics, growth patterns, and flowering times, making some more suitable for outdoor cultivation than others. When selecting strains for outdoor growing, consider the following factors:
Climate Suitability. Choose strains that are known to thrive in your local climate. Some strains are better suited for warm and sunny environments, while others are more resistant to cooler or wetter conditions.
Pest and Disease Resistance. Look for strains that have strong natural resistance to common pests and diseases found in your area. Robust genetics can help reduce the risk of infestations and increase plant health.
Mold and Mildew Resistance. Outdoor cannabis plants are susceptible to mold and mildew, especially in humid environments. Select strains known for their mold resistance to mitigate this risk.
Harvest Time. Consider the length of your growing season and the expected time to harvest. Choose strains with flowering periods that match the duration of your local climate.
Size and Structure. Take into account the available space and desired plant size. Some strains naturally grow taller and bushier, while others are more compact and manageable.
Yield Potential. Outdoor growers often aim for high-yielding strains to maximize their harvest. Look for strains with a reputation for producing abundant and potent buds.
Terpene Profile. Consider the terpene profile of the strain to select flavors and aromas that appeal to your preferences.
Genetics and Breeder Reputation. Choose strains from reputable breeders with a track record of stable genetics and quality seeds.
Here are some popular cannabis strains that are well-regarded for outdoor cultivation:
Northern Lights: An indica-dominant strain that is hardy and resistant to cold temperatures, making it suitable for cooler climates.
Haze strains: Many Haze varieties, such as Super Silver Haze or Lemon Haze, do well outdoors, particularly in sunny and Mediterranean-like climates.
OG Kush: This popular indica-dominant strain adapts well to outdoor environments and has a relatively short flowering time.
Skunk strains: Skunk #1 and its derivatives are known for their vigor, potency, and resistance to various environmental challenges.
Pineapple Express: A hybrid strain with strong resistance to pests and diseases, making it a good option for outdoor growers.
Remember that even the best strains for outdoor cultivation require proper care, attention, and an understanding of your local climate to achieve successful results. Conduct research, seek advice from experienced growers in your region, and experiment with strains that suit your preferences and growing environment.
How to properly prepare a plant hole and nutrient-rich soil when growing cannabis outdoors?
Properly preparing a plant hole and nutrient-rich soil is essential for giving your outdoor cannabis plants the best possible start and providing them with the necessary nutrients throughout their growth cycle. Here's a step-by-step guide to preparing the plant hole and soil for outdoor cannabis cultivation:
Selecting the Location. Choose a suitable outdoor location that receives ample sunlight throughout the day. Make sure the area is well-draining and protected from strong winds, if possible.
Clear the Area. Remove any weeds, rocks, or debris from the chosen site. Clearing the area helps prevent competition for nutrients and ensures the cannabis plants have sufficient space to grow.
Digging the Plant Hole. Dig a hole that is about two to three times wider than the root ball of the cannabis plant and around 1 to 2 feet deep. This allows the roots to spread easily and access nutrients in the surrounding soil.
Soil Preparation. In a separate container or wheelbarrow, prepare the nutrient-rich soil mixture that will go back into the hole. Use a high-quality organic potting soil or create a supersoil mix by amending the base soil with organic nutrients and amendments. Refer to the "What is supersoil? How to make it according to Subcool's recipe?" section for a nutrient-rich supersoil recipe.
Adding Amendments. Mix in the organic amendments and nutrients into the soil mixture thoroughly. This will ensure an even distribution of nutrients in the soil.
Backfilling the Hole. Fill the hole with the nutrient-rich soil mixture, leaving enough space to place the cannabis plant at the same depth it was previously growing. Gently tamp down the soil to eliminate air pockets and create a stable planting environment.
Planting the Cannabis Seedling or Clone. If you're using seedlings, carefully remove them from their containers and place them in the center of the prepared hole. For clones, gently transplant them into the hole at the same depth they were in their original containers. Be cautious not to damage the roots during the process.
Watering and Mulching. After planting, thoroughly water the plant to help it settle in its new environment. Applying a layer of organic mulch around the base of the plant can help retain moisture, suppress weeds, and provide additional nutrients as the mulch breaks down.
Maintenance and Care. Throughout the growing season, monitor the moisture levels in the soil and water the plant as needed. Supplement with organic nutrients or compost tea if required, based on the plant's growth stage and any signs of nutrient deficiencies.
By properly preparing the plant hole and using nutrient-rich soil, you provide your outdoor cannabis plants with a strong foundation for healthy growth and optimal yields. Regularly tending to your plants' needs and providing proper care will contribute to a successful and rewarding outdoor cannabis cultivation experience.
When is it a good time to plant cannabis outdoors?
The best time to plant cannabis outdoors depends on the specific climate and growing region. In general, cannabis is a warm-season plant that thrives in temperatures between 60 °F to 85 °F (15 °C to 29 °C). It is essential to consider the local climate, frost dates, and the length of the growing season to determine the ideal time for outdoor planting. Here are some guidelines for finding the right time to plant cannabis outdoors:
Consider Your Local Climate. Know the average frost dates in your region and be aware of any potential weather patterns that could pose a risk to young cannabis plants. Frost can be damaging to cannabis, especially in the early stages of growth.
Germinate Indoors. Depending on the local climate and the strain's growth requirements, you can start cannabis plants indoors and transplant them outdoors after the last frost, or you can directly sow seeds into prepared outdoor soil when conditions are suitable. This way, you'll have healthy seedlings ready to transplant outdoors when the weather is favorable. Plant seeds or seedlings when outdoor nighttime temperatures do not drop below 50°F (10°C).
Growing Season Length. Calculate the length of your region's growing season, which is the period between the last frost in spring and the first frost in fall. Cannabis requires several months to complete its full growth cycle, so ensure your growing season is long enough to accommodate the strain's flowering period.
Choose the Right Strain. Different cannabis strains have varying flowering times. Some strains are faster-flowering and better suited for regions with shorter growing seasons, while others take longer to mature. Choose strains that match your preferences, local climate, and growing season.
Temperature and Sunlight. Wait until daytime temperatures are consistently above 60°F (15°C) and ensure that plants receive ample sunlight throughout the day to promote healthy growth.
Monitor Daylight Hours. Keep an eye on the daylight hours in your region as the growing season progresses. Cannabis plants require a certain number of hours of darkness to initiate flowering. If the natural daylight is decreasing rapidly, make sure your plants are old enough to handle the transition to flowering.
Autoflowering Strains. Autoflowering cannabis strains are not dependent on light cycles for flowering, making them more flexible for outdoor cultivation. They can be planted throughout the growing season as long as there is sufficient time before the first fall frost.
In many regions with temperate climates, planting cannabis outdoors is typically done in the spring, after the last frost has passed and when temperatures are consistently mild. However, in regions with warmer climates and longer growing seasons, it may be possible to plant cannabis outdoors earlier in the year.
Before planting, always check local weather forecasts and don't hesitate to ask GanjaSeeds consultants for advice on choosing the right seeds for your region. By considering the factors mentioned above and understanding your local climate, you can determine the optimal time to plant cannabis outdoors for a successful and productive growing season.
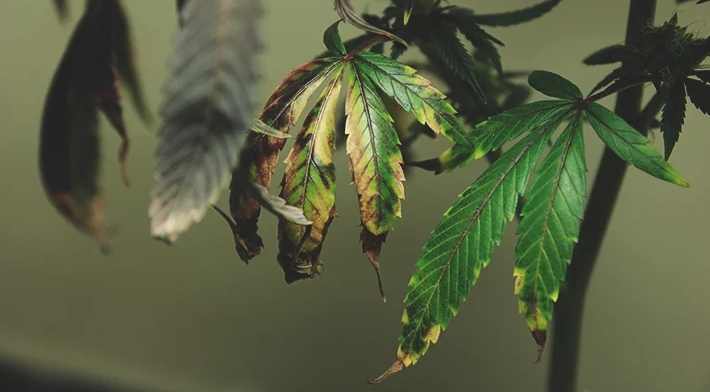
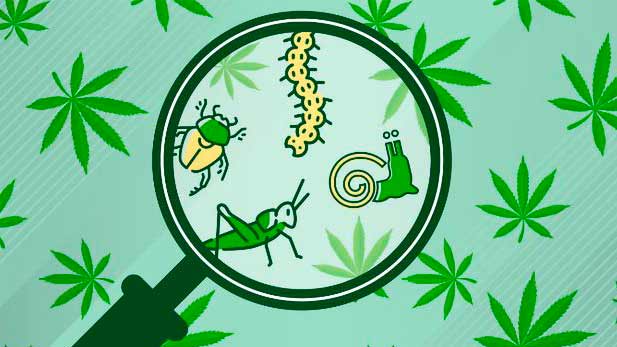
Can the cannabis plant get sick?
Yes, cannabis plants can get sick and are susceptible to various diseases and pests. Just like any other plant, cannabis is vulnerable to a range of pathogens, environmental stresses, and pest infestations that can negatively affect its health and growth. These issues can arise during indoor and outdoor cultivation and can impact plants at different stages of their growth cycle.
Common cannabis plant health issues include:
Fungal Diseases. Fungi can cause diseases such as powdery mildew, gray mold (botrytis), and root rot. These diseases thrive in humid conditions and can quickly spread through the plant, leading to reduced yields and compromised plant health.
Bacterial Infections. Bacterial diseases like bacterial wilt and canker can harm cannabis plants, causing wilting, yellowing of leaves, and even death.
Nutrient Deficiencies. Cannabis plants require a balanced mix of nutrients to grow healthily. Nutrient deficiencies can occur due to poor soil quality or improper nutrient supplementation, resulting in stunted growth, discoloration of leaves, and reduced bud production.
Pests. Cannabis plants are susceptible to a variety of pests, including spider mites, aphids, thrips, and caterpillars. Pests can cause damage by feeding on plant tissues, sucking sap, or transmitting diseases.
Environmental Stress. Cannabis plants can experience stress from extreme temperatures, drought, excessive watering, or poor ventilation. Environmental stress can lead to wilting, leaf curling, and other adverse effects.
Overwatering and Root Issues. Overwatering or poor drainage can lead to root rot and other root-related problems, affecting the overall health of the plant.
To protect cannabis plants from getting sick, growers should adopt preventive measures, including:
Maintaining Cleanliness. Keep the grow area clean and free from debris to reduce the likelihood of pathogens taking hold.
Regular Inspection. Regularly inspect your plants for any signs of disease or pest infestations. Early detection allows for timely intervention and treatment.
Proper Nutrition. Ensure your plants receive the right balance of nutrients to prevent nutrient deficiencies or toxicities.
Pest Control. Implement integrated pest management (IPM) strategies to control pests and minimize their impact on the plants.
Proper Ventilation. Good airflow and ventilation can help reduce humidity and prevent the development of fungal diseases.
Quarantine for New Plants. If introducing new plants into your garden, quarantine them for a period to ensure they are free from pests and diseases.
By being proactive and attentive to the health of your cannabis plants, you can minimize the risk of sickness and promote vigorous growth, leading to a successful and healthy harvest. If you encounter any issues with your plants, seek advice from experienced growers or horticulturists to diagnose the problem and implement appropriate remedies.
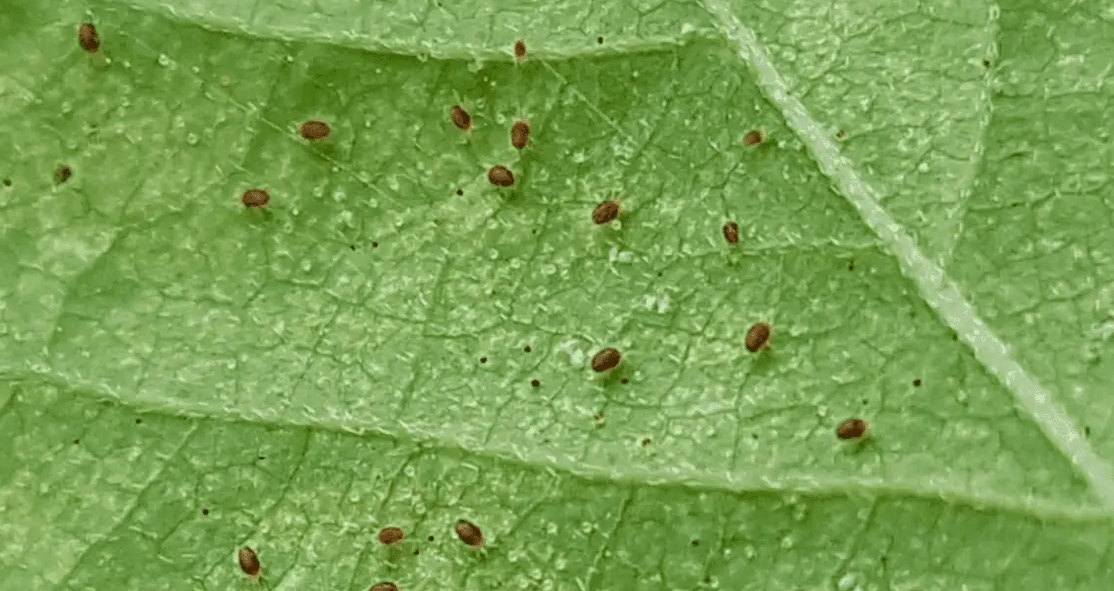
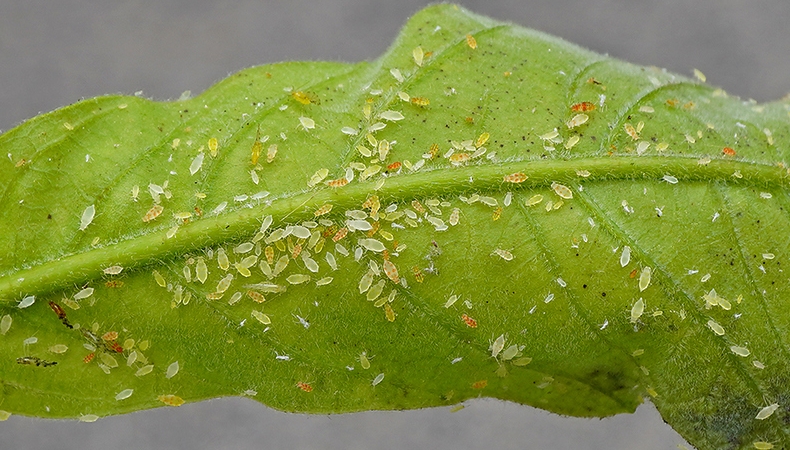
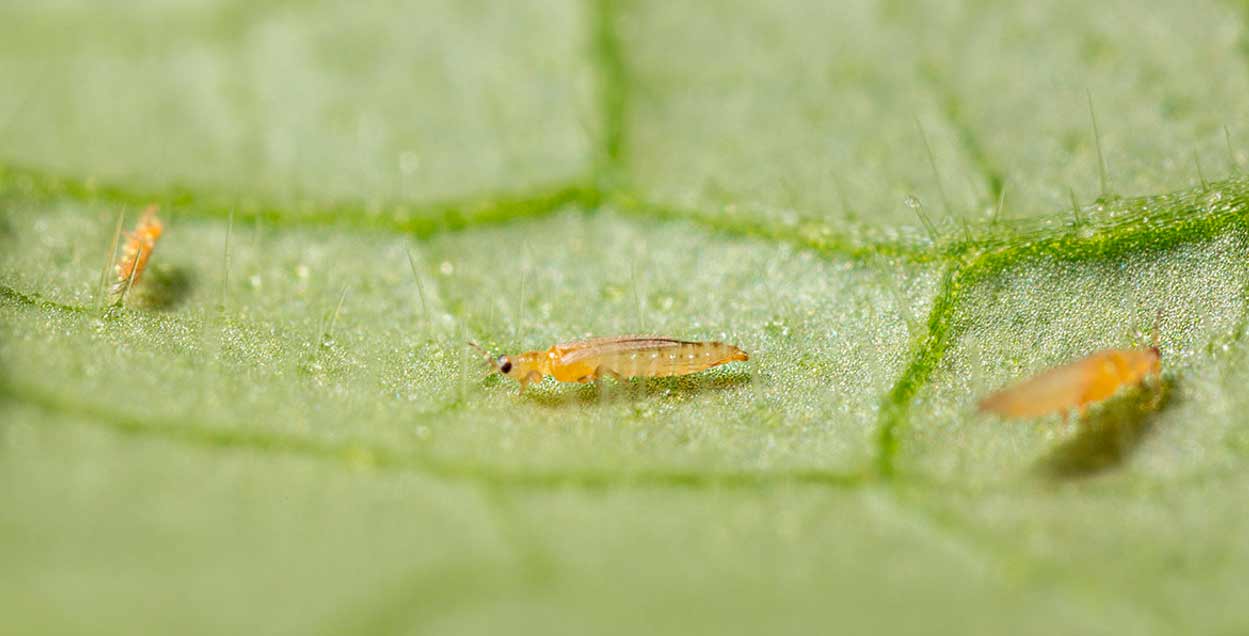
How to control the most common cannabis pests?
Controlling common cannabis pests requires a combination of preventive measures and targeted treatments. Integrated pest management (IPM) is an effective approach that combines various strategies to minimize pest populations while minimizing the use of harmful chemicals. Here are some methods to control the most common cannabis pests:
Spider Mites
Regularly inspect plants for early signs of infestation, such as webbing and stippling on leaves. Introduce natural predators like ladybugs, predatory mites, and lacewings to control spider mite populations. Spray plants with neem oil, insecticidal soap, or horticultural oils to suffocate and kill spider mites.
Aphids
Use reflective mulches or reflective sticky traps to deter aphids from landing on plants. Release beneficial insects like ladybugs and parasitic wasps, which are natural predators of aphids. Spray plants with neem oil or insecticidal soap to kill aphids.
Thrips
Apply sticky traps to monitor and capture adult thrips. Introduce predatory mites or beneficial nematodes to control thrips larvae in the soil. Use neem oil or insecticidal soap to eliminate thrips.
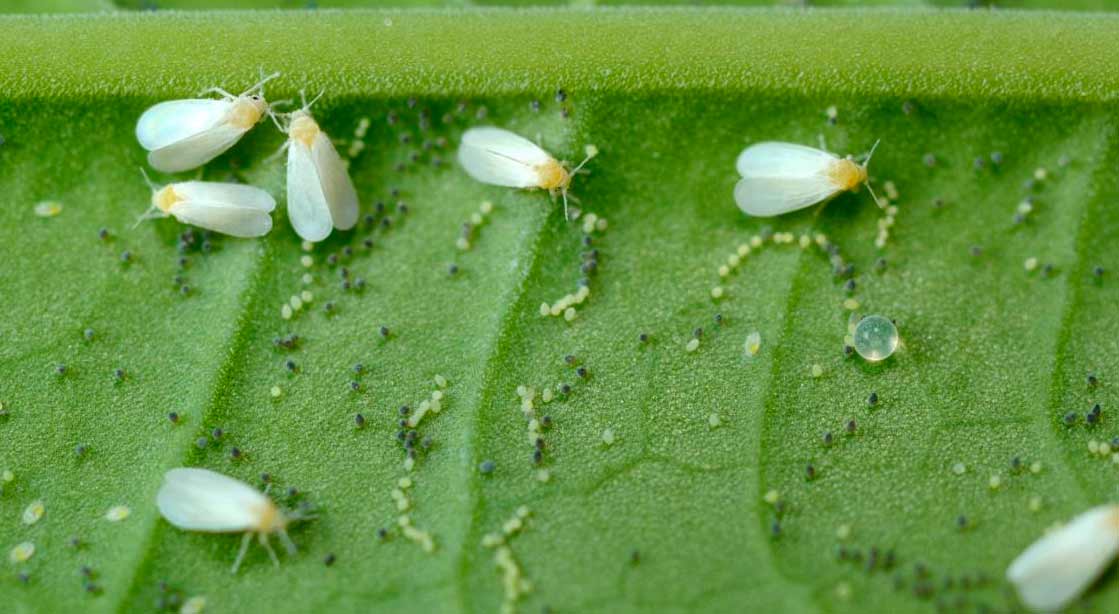
Whiteflies
Hang sticky traps near plants to capture adult whiteflies. Introduce beneficial insects like ladybugs and parasitic wasps, which prey on whiteflies. Apply neem oil or insecticidal soap to control whitefly populations.
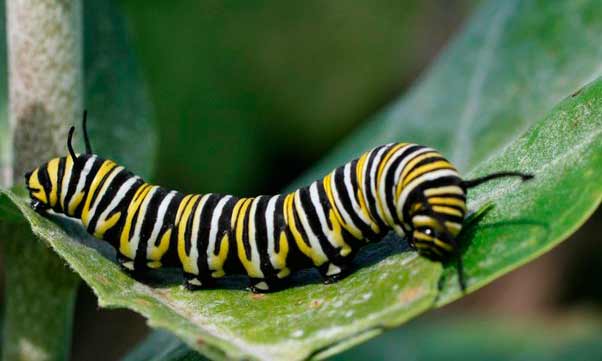
Caterpillars and Worms
Handpick and remove caterpillars from plants if the infestation is manageable. Release predatory insects like green lacewings or use Bacillus thuringiensis (Bt) products, which are a natural bacterial pesticide specifically targeting caterpillars.
Gnats and Fungus Gnats
Allow the top layer of soil to dry out between waterings to reduce fungus gnat larvae development.
Apply sticky traps to capture adult gnats. Apply beneficial nematodes to the soil to control gnat larvae.
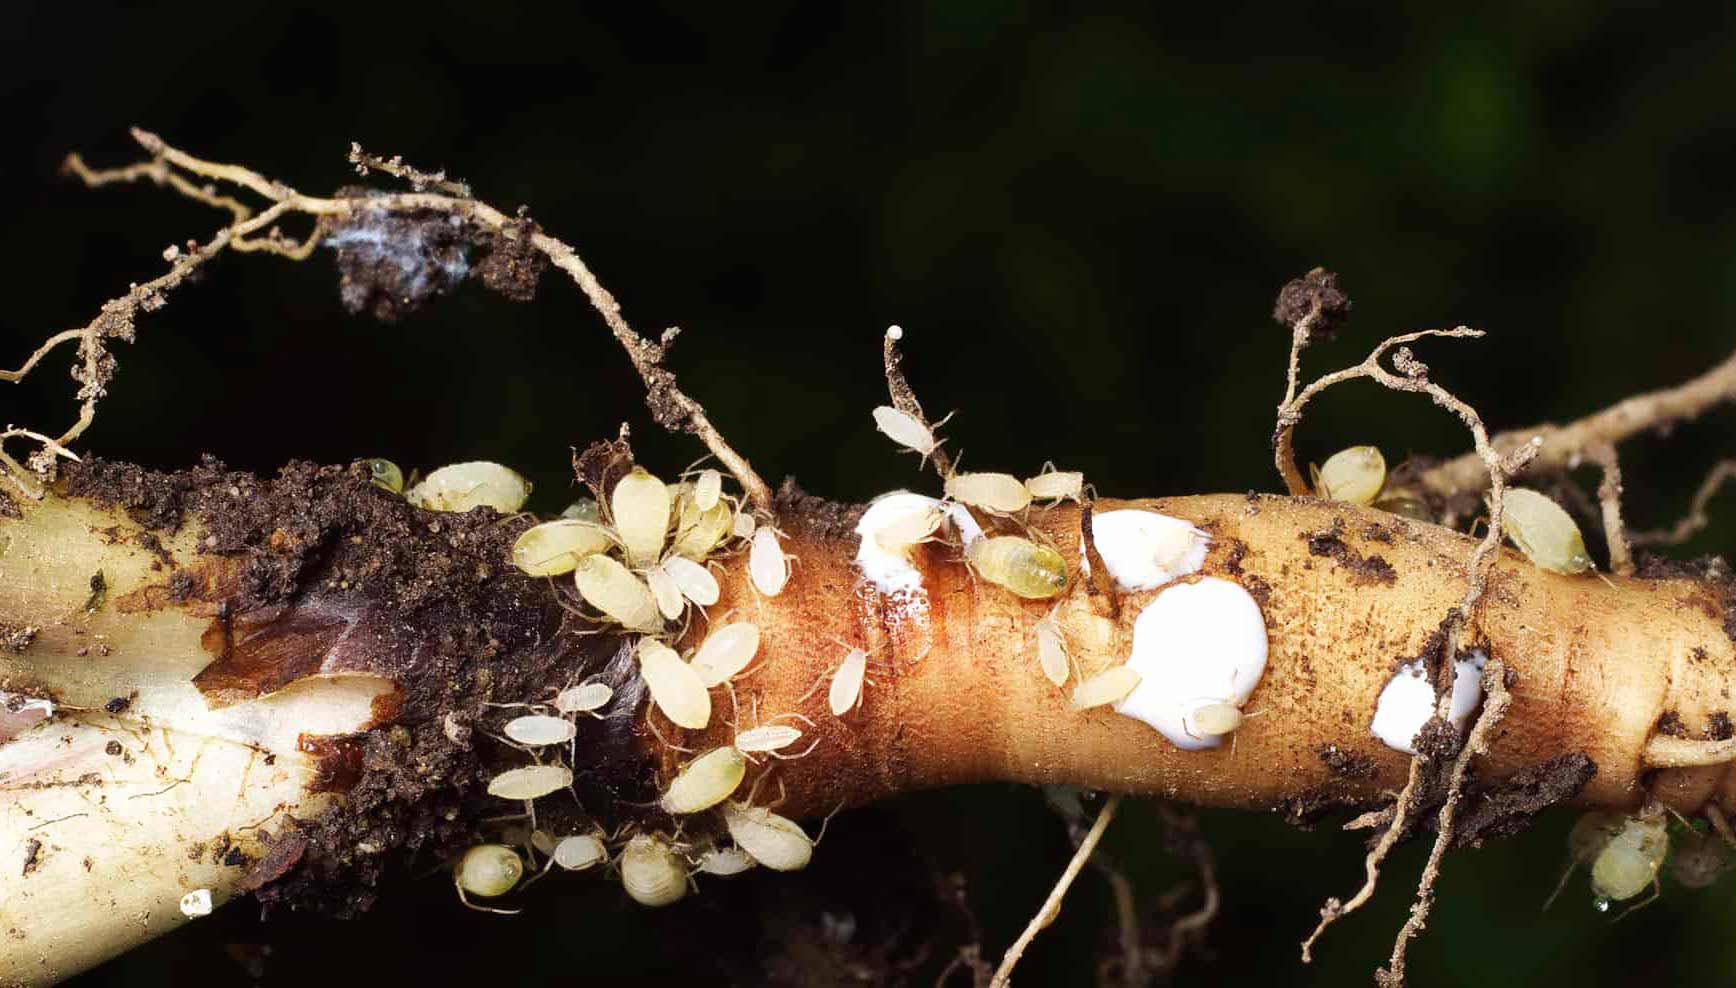
Root Aphids
Use a preventive approach by regularly inspecting new plants before introducing them to the garden.
Apply beneficial nematodes to the soil to control root aphids. Avoid overwatering, as root aphids thrive in moist conditions.
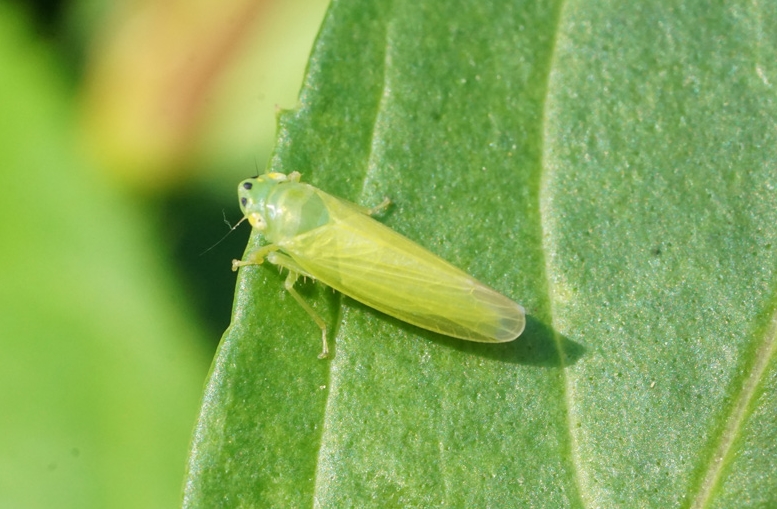
Leafhoppers
Use sticky traps to capture leafhoppers. Keep the garden area free from weeds, as they can serve as hosts for leafhoppers. Apply neem oil or insecticidal soap to control leafhoppers.
Slugs and Snails
Remove hiding places such as boards, rocks, and debris, where slugs and snails hide during the day. Place beer traps or shallow dishes of beer around the plants to attract and drown slugs and snails. Use diatomaceous earth or copper tape to create barriers that deter slugs and snails.
Remember to always follow the manufacturer's instructions when using pesticides or treatments, and avoid harsh chemicals that can harm beneficial insects and the environment. By combining preventive practices with targeted treatments, you can effectively manage common cannabis pests and promote a healthy and thriving garden. IPM is an ongoing process that requires vigilance, keeping your grow area clean at all times, early intervention, and regular monitoring to ensure the health and vitality of your cannabis plants. Regularly inspecting your plants and promptly addressing any pest issues can help maintain a pest-free environment for your cannabis crop.
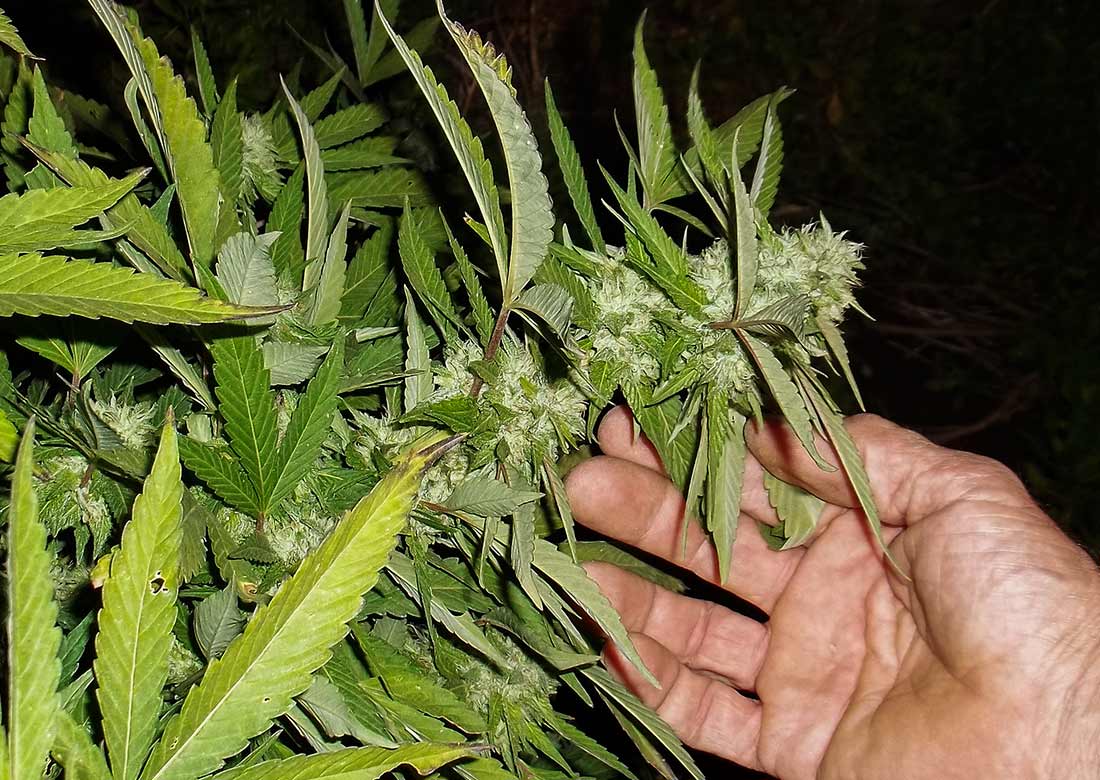
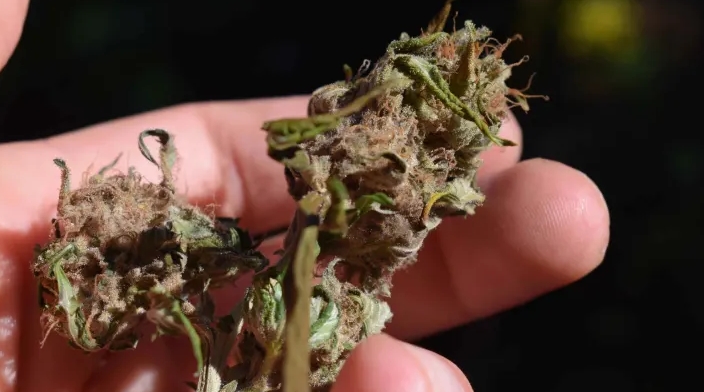
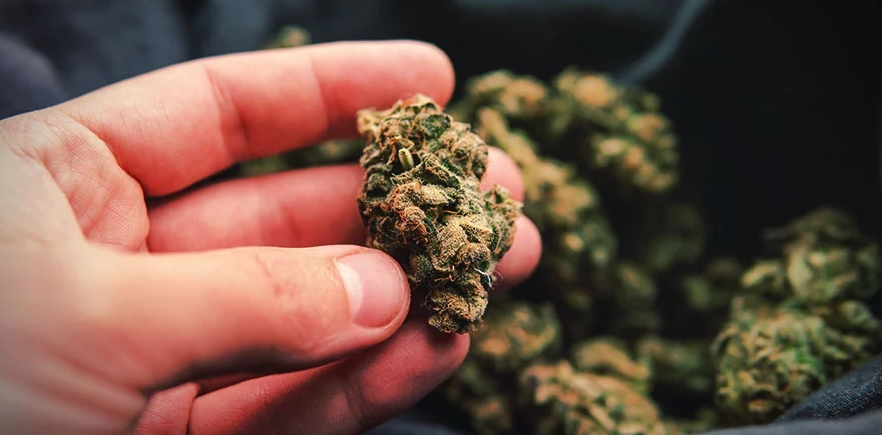
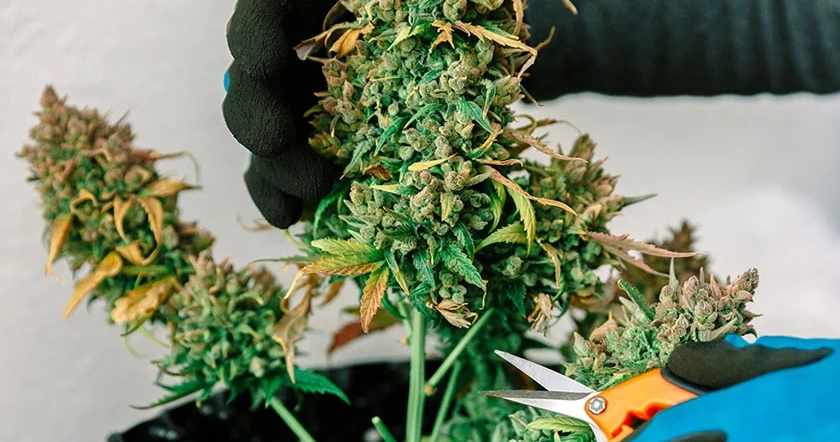
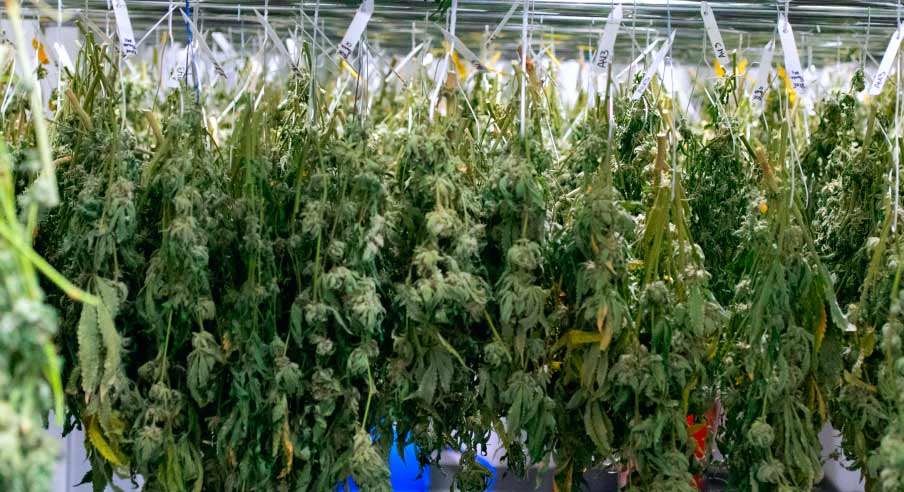
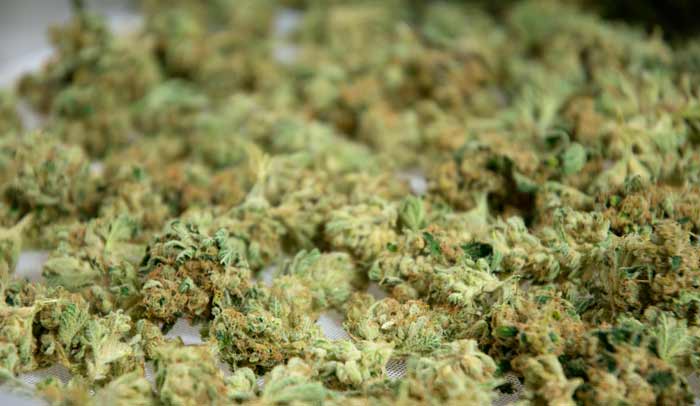
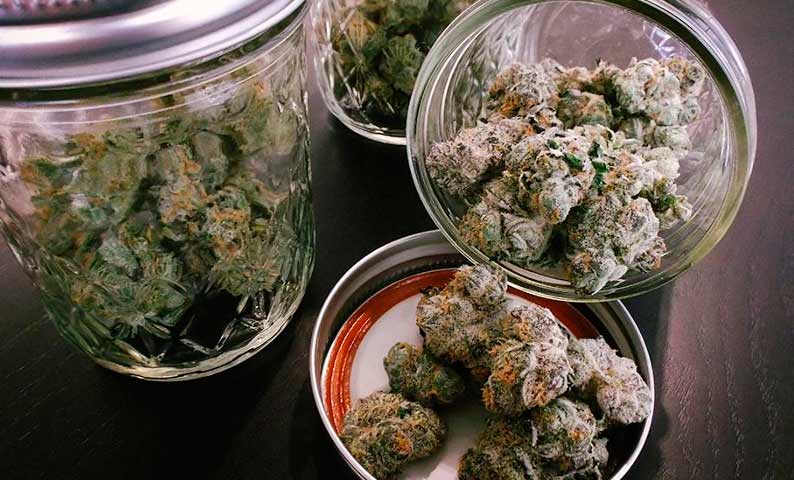
How to determine if a cannabis plant is ready to be harvested?
Determining the right time to harvest your cannabis plants is crucial to ensure you achieve the desired potency, flavor, and overall quality of the buds. Harvesting too early or too late can significantly impact the final product. Here are some key indicators to help you determine if a cannabis plant is ready to be harvested:
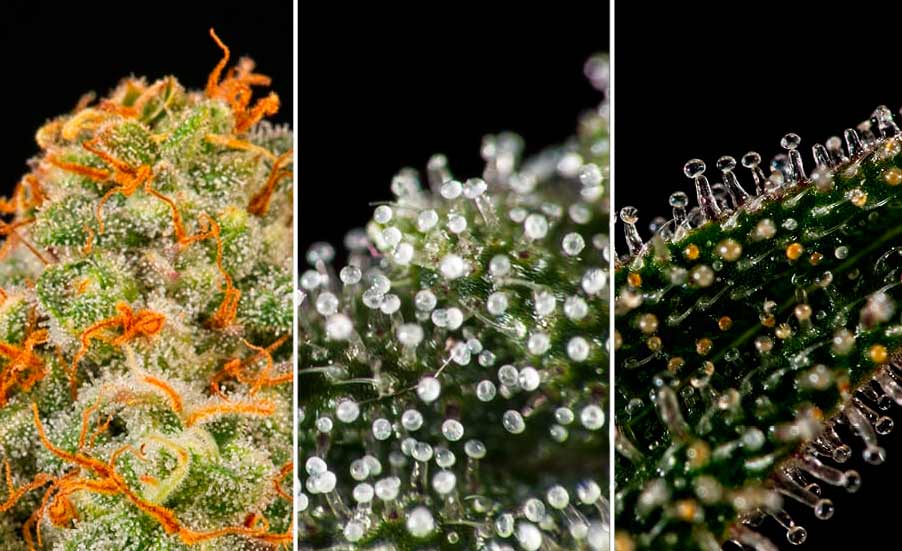
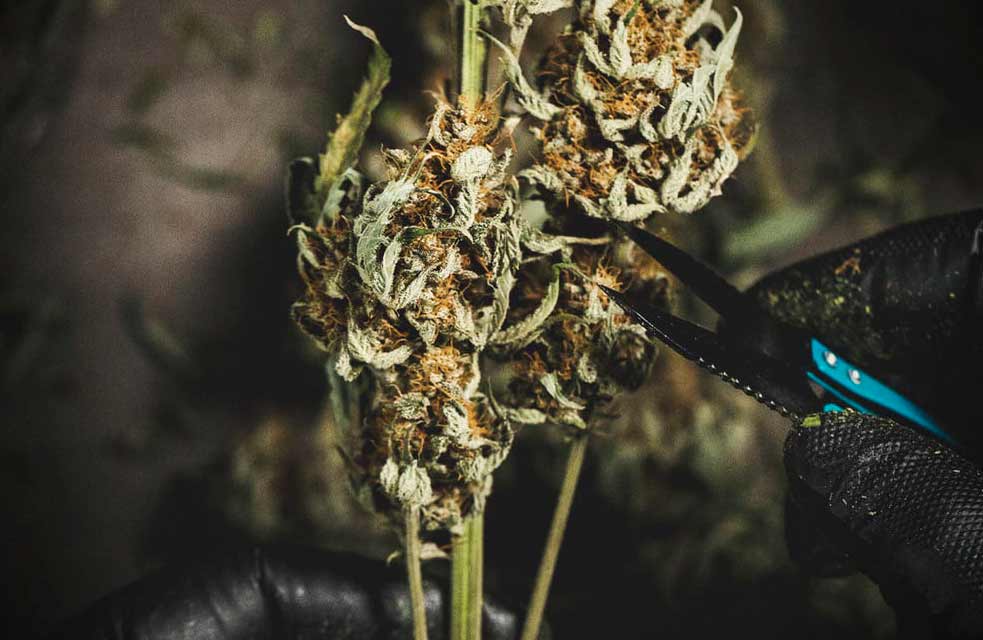
Trichome Color
One of the most reliable ways to determine harvest readiness is by examining the color of the trichomes (the tiny, crystal-like resin glands on the buds). Use a magnifying tool or a jeweler's loupe to inspect the trichomes closely. The trichomes go through several stages of development:
Clear trichomes. Harvesting at this stage will result in a more cerebral, uplifting high with less potent effects. The buds may not have reached their full potential in terms of potency and flavor.
Milky/Cloudy trichomes. This is generally the ideal time to harvest for most cannabis strains. The buds will offer a balanced mix of THC and other cannabinoids, providing a euphoric and relaxing effect.
Amber trichomes. Harvesting when some trichomes have turned amber can lead to a more sedative and calming effect. If you prefer a more relaxing high, harvest at this stage. However, too many amber trichomes might indicate overripeness, resulting in a more couch-lock effect.
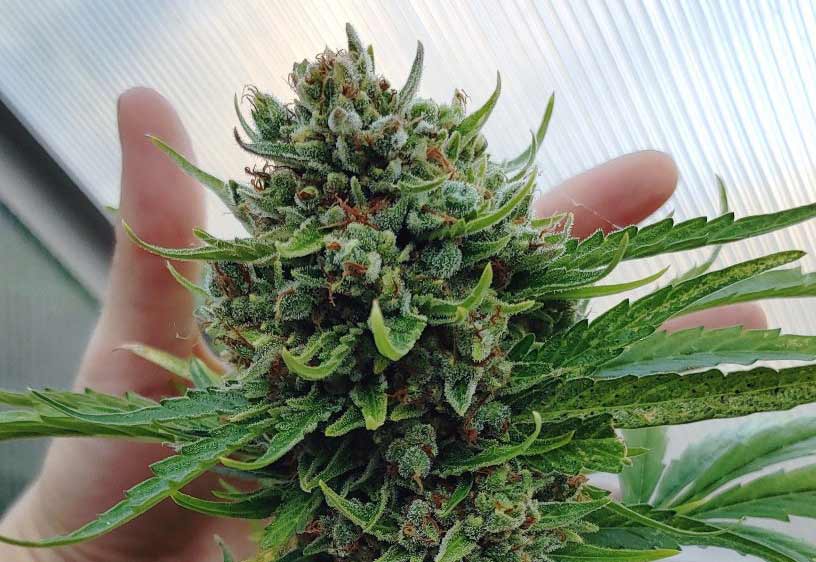
Pistil Color
Another visual indicator is the color of the pistils (the hair-like structures on the buds). As the plant matures, pistils change color from white to reddish-brown. When about 70-90% of the pistils have darkened and curled in, it's a good sign that the plant is close to harvest. However, pistil color should not be the sole determining factor, as it can vary depending on the strain.
Bud Size and Density
The buds should have filled out and become dense during the later stages of flowering. Buds that are loose and airy may not be fully matured.
Leaf Color
As the plant approaches harvest, the leaves may start to yellow and die off. This is a normal part of the plant's natural senescence process.
Aroma and Smell
The buds should emit a strong, pleasant aroma as they near harvest. The terpene profile will contribute to the strain's unique scent.
Check the Trichomes on Different Parts of the Plant
Trichomes may mature at different rates on different parts of the plant. Check the trichomes on various bud sites to ensure you get an accurate overall picture of the plant's readiness.
Keep in mind that the specific harvest window can vary depending on the strain, growing conditions, and personal preferences. Documenting and experimenting with different harvest times can help you find the sweet spot for your preferred effects and flavor. Harvesting too early or too late can have a significant impact on the overall quality of your cannabis, so it's crucial to pay close attention to these indicators to make an informed decision.
What is the proper way to harvest cannabis?
Harvesting cannabis is a critical step in the cultivation process that directly impacts the quality of the final product. Properly harvesting cannabis involves several steps to ensure the best potency, flavor, and overall experience. Here's a step-by-step guide on how to harvest cannabis properly:
Timing
Harvest cannabis when the trichomes have reached their desired level of maturity, as indicated by their color. Look for a mix of milky and clear trichomes, with some amber ones depending on your preference for effects. Avoid harvesting too early when the trichomes are predominantly clear, as the buds will have lower potency.
Prepare Your Tools
Gather the necessary tools for harvesting, such as sharp trimming scissors, latex gloves (optional), a clean and dry surface for trimming, and storage containers or glass jars for curing.
Flush the Plants (Optional)
If you've been using nutrients or fertilizers, consider flushing the plants with plain, pH-balanced water for a few days before harvest. Flushing helps remove any remaining nutrients and salts from the plant, resulting in a smoother and more flavorful smoke.
Water the Plants (Optional)
Some growers water their plants shortly before harvest to prevent the leaves from becoming too dry and brittle, making it easier to handle during trimming.
Choose the Right Time of Day
For the best flavor and aroma, consider harvesting your cannabis in the early morning after the dew has dried but before the heat of the day. This is when terpene levels are typically at their highest.
Cut the Main Stem
Start by cutting the main stem of the cannabis plant at the base using clean and sharp pruning shears or scissors. This will make it easier to handle and trim the individual branches.
Trim the Branches
Trim each branch individually, removing any large fan leaves first. Then, trim the smaller sugar leaves surrounding the buds, leaving behind the fully developed and resinous flowers. Some growers prefer a more manicured appearance, while others may leave more leaf material for improved curing.
Dry the Buds
Hang the trimmed branches upside down in a dark, well-ventilated area with moderate humidity. Maintain a temperature of around 65-75°F (18-24°C). Proper drying typically takes around 7 to 14 days, depending on the environmental conditions.
Cure the Buds
Once the buds are dry, transfer them into glass jars or airtight containers for the curing process. Cure the buds in a dark, cool place, opening the containers daily for the first week to release excess moisture and ensure proper curing. The curing process should last for at least two weeks, although many cannabis enthusiasts prefer to cure their buds for a month or more to enhance flavor, smoothness, and potency.
Store Properly
After the curing process is complete, store the cured buds in a cool, dark place, away from direct sunlight and moisture. Use airtight containers to preserve the quality of the cannabis.
How to dry cannabis properly?
Drying cannabis properly is a crucial step in the post-harvest process that significantly impacts the final quality and flavor of the buds. Drying involves removing moisture from the harvested cannabis flowers while preserving their cannabinoids, terpenes, and overall potency. Here's a step-by-step guide on how to dry cannabis properly:
1. Harvest at the Right Time
Ensure that you harvest your cannabis plants at the optimal time when the trichomes have reached their desired level of maturity. Refer to the "How to determine if a cannabis plant is ready to be harvested?" section for guidance on determining harvest readiness.
2. Prepare the Drying Area
Designate a dedicated drying area that is cool, dark, well-ventilated, and free from excessive humidity. Avoid drying cannabis in areas with strong odors, as the plants can absorb those smells.
3. Cut the Branches
After harvesting, carefully trim the branches of the cannabis plant, removing any large fan leaves but leaving the smaller sugar leaves surrounding the buds intact. Trimming the branches will facilitate the drying process and make it easier to handle the buds.
4. Hang the Buds Upside Down
Using string or hooks, hang the trimmed cannabis branches upside down in a dark, well-ventilated room. Ensure there is enough space between the branches to allow air to circulate freely around the buds.
5. Control Temperature and Humidity
Maintain a drying environment with a temperature of around 65-75°F (18-24°C) and a humidity level of 45-55%. Avoid excessively high humidity levels, as this could promote mold growth, and avoid extremely low humidity levels, as this could dry out the buds too quickly.
6. Monitor Drying Progress
Regularly check the buds for dryness during the drying process. Gently touch the smaller branches or individual buds to see if they feel dry on the outside but still slightly moist on the inside. The drying process typically takes around 7 to 14 days, depending on environmental conditions and the size of the buds.
7. Dry in Darkness
Keep the drying room dark during the process, as exposure to light can degrade cannabinoids and terpenes.
8. Slow and Steady Drying
Avoid the temptation to speed up the drying process by using heat sources or fans. Rapid drying can cause the outer layer of the buds to dry too quickly, resulting in a harsher smoke and loss of flavor and potency.
9. Use a Hygrometer (Optional)
Consider using a hygrometer to monitor the humidity levels in the drying room accurately. This can help you maintain an optimal drying environment.
10. Test Dryness
To determine if the buds are adequately dried, perform the "snap test." Take a smaller branch or bud and gently bend it. If it snaps rather than bending or folding, the buds are likely dry and ready for curing.
11. Trimming After Drying (Optional)
Some growers prefer to trim their buds more thoroughly after drying, as it can be easier to trim when the buds are dry. However, others may choose to do a more minimal trim before drying and save the final manicuring for after the curing process.
12. Cure the Buds
Once the buds are dry, transfer them into airtight containers, such as glass jars. This initiates the curing process, during which the remaining moisture inside the buds is redistributed more evenly. Open the containers daily for the first week to release excess moisture and ensure proper curing.
13. Store Properly
After the curing process is complete, store the cured buds in a cool, dark place, away from direct sunlight and moisture. Use airtight containers to preserve the quality of the cannabis.
Properly drying cannabis ensures that the buds retain their flavor, potency, and smoothness. Rushing the drying process can result in harsh-tasting and less potent buds, while a slow and controlled drying process leads to a more enjoyable and high-quality final product. Remember, patience is key during the drying and curing process to achieve the best results.
What is "curing" and how to do it properly?
Curing is a crucial post-harvest process that involves carefully storing dried cannabis buds in a controlled environment to improve their flavor, aroma, and potency. During the curing process, certain chemical reactions occur within the buds that enhance the overall quality of the cannabis. Properly cured buds are smoother to smoke or vape, have a more complex and pleasant taste, and provide a better overall user experience. Curing can take anywhere from 2 weeks to 2 months, depending on the condition and density of buds. The curing process significantly improves the flavor, aroma, and potency of cannabis. All that is required of a grower is to follow the technique.
Here's a step-by-step guide on how to cure cannabis properly:
1. Prepare Curing Containers
After drying the cannabis buds, transfer them into airtight glass jars or containers. Mason jars with a rubber seal and latch are popular choices as they provide an excellent seal to keep air out and moisture in.
2. Fill the Jars Correctly
Place the dried cannabis buds in the jars, filling them about 2/3 to 3/4 full. Avoid overpacking the jars to allow for some air circulation.
3. Burping the Jars
During the first week of curing, open the jars once or twice a day for a few minutes each time. This process is known as "burping." Opening the jars allows excess moisture to escape and fresh air to enter, preventing mold growth. Check the buds for any signs of moisture buildup or mold and remove any affected material.
4. Check for Optimal Humidity
While burping the jars, monitor the humidity levels inside. Use a hygrometer or humidity packs (e.g., Boveda packs) to maintain a relative humidity (RH) of around 58-62%. This range helps preserve the moisture content of the buds without causing mold growth or over-drying.
5. Patience and Time
Curing takes time, and the process can vary depending on factors like humidity, bud density, and personal preference. For most strains, curing for at least two weeks is recommended. However, many cannabis enthusiasts prefer to cure their buds for four weeks or more to achieve the best results.
6. Regular Inspection
During the curing process, regularly inspect the buds for any signs of mold, mildew, or improper curing. If you notice any issues, remove the affected buds, and adjust the curing conditions accordingly.
7. Store in a Cool, Dark Place
Keep the curing jars in a cool, dark place away from direct sunlight and sources of heat. Proper storage conditions help preserve the flavor, aroma, and potency of the buds.
8. Gradual Improvement
As the curing process progresses, you will notice a gradual improvement in the aroma and taste of the buds. Proper curing enhances the terpene profile and promotes the breakdown of chlorophyll, resulting in a smoother and more enjoyable smoking or vaping experience.
Curing is a critical step that requires patience and attention to detail. By following these guidelines and regularly checking on the buds during the curing process, you can ensure that your cannabis reaches its full potential, providing a more satisfying and premium end product.
What is the best way to store cannabis when it is dried and cured?
The best way to store dried and cured cannabis is to ensure it remains in optimal conditions to preserve its flavor, potency, and overall quality. Proper storage is essential to prevent degradation and maintain the integrity of the buds over time. Here's the best way to store cannabis after it has been dried and cured:
Airtight Glass Jars
Use airtight glass jars with a rubber seal and latch, such as Mason jars. These jars provide an excellent seal that keeps air out and moisture in, creating a controlled environment for the cannabis.
Avoid Plastic Containers
Avoid storing cannabis in plastic bags or containers, as they can create static electricity, which can lead to trichome loss and decrease the overall quality of the buds.
Use Humidity Packs
Consider using humidity packs, such as Boveda packs or Integra Boost packs, inside the jars to help regulate the humidity and maintain an optimal moisture level. These packs release or absorb moisture as needed, keeping the relative humidity at around 58-62%.
Store in a Cool, Dark Place
Place the sealed jars in a cool, dark, and dry location away from direct sunlight, heat sources, and humidity. Exposure to light and heat can degrade cannabinoids and terpenes, leading to a loss of potency and flavor.
Avoid Frequent Opening
While it's essential to open the jars occasionally during the initial curing process (burping), avoid unnecessary opening once the curing process is complete. Each time the jar is opened, some moisture and terpenes are released, which may impact the overall quality over time.
Regular Inspection
Periodically check the stored cannabis for any signs of mold, mildew, or deterioration. If you notice any issues, remove the affected buds and adjust the storage conditions accordingly.
Label and Date the Jars
Label the jars with the strain name and the date of harvest or curing. This helps you keep track of the aging process and ensures you can differentiate between different strains if you have multiple jars.
Limit Oxygen Exposure
Oxygen exposure can lead to the degradation of cannabinoids and terpenes. If you have smaller amounts of cannabis in larger jars, consider using smaller containers or adding extra packing material to minimize air space.
Avoid Freezing
While freezing can preserve some plant material, it is generally not recommended for cannabis. Freezing can cause the delicate trichomes to become brittle and break off, reducing the overall potency and quality of the buds. Moreover, extended exposure to low temperatures will freeze out a certain amount of moisture in the buds, which is essential for maintaining texture, flavor, and aroma.
Separate Strains
If you have multiple strains, it's best to store each strain in separate jars. This prevents cross-contamination of aromas and flavors.
Use Slow-Curing
Some enthusiasts prefer to continue the curing process even after storing by "slow-curing" the cannabis for an extended period. Slow-curing allows the buds to further develop in flavor and potency.
By following these storage guidelines, you can help ensure that your dried and cured cannabis retains its peak quality, providing a more satisfying and enjoyable experience every time you use it. Properly stored cannabis can maintain its freshness and potency for several months, allowing you to savor the fruits of your labor long after harvest.
In Conclusion
The art of cannabis cultivation offers a fulfilling and rewarding experience for enthusiasts and growers alike. Whether you prefer the controlled environment of indoor cultivation or the natural charm of outdoor gardening, the key lies in mastering each step of the process.
Starting with selecting high-quality seeds and understanding the intricacies of germination, you will lay the foundation for healthy and robust cannabis plants. Throughout the entire growth cycle, paying attention to lighting, ventilation, and proper watering will ensure optimal development and yield.
Take the opportunity to experiment and learn from our experts, and incorporate their valuable insights into your practices. By doing so, you can hone your growing skills and achieve exceptional results.
So, embrace this unique venture of cannabis growing with enthusiasm and dedication. With your newfound knowledge and passion, you can confidently nurture your cannabis plants and reap a bountiful and rewarding harvest. GanjaSeeds wishes you happy growing!
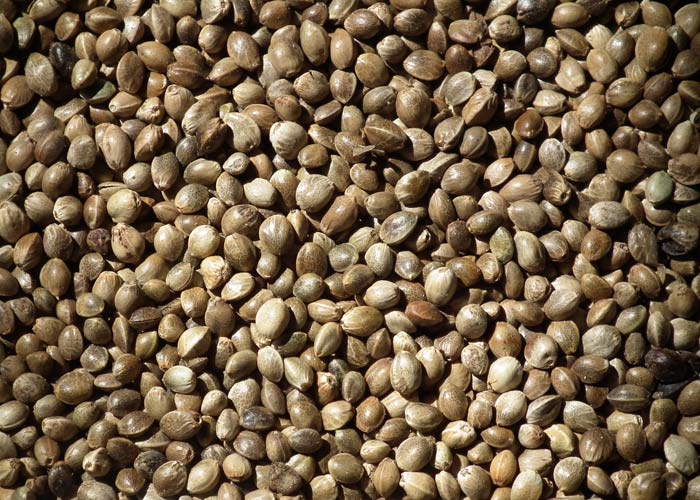
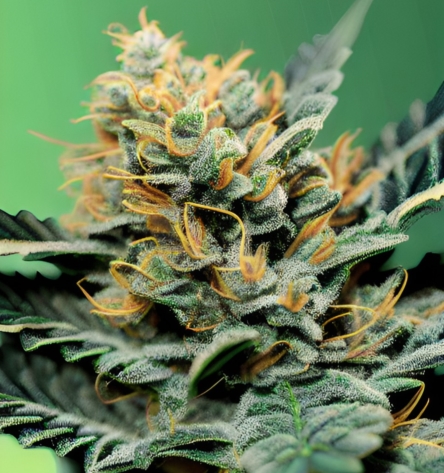
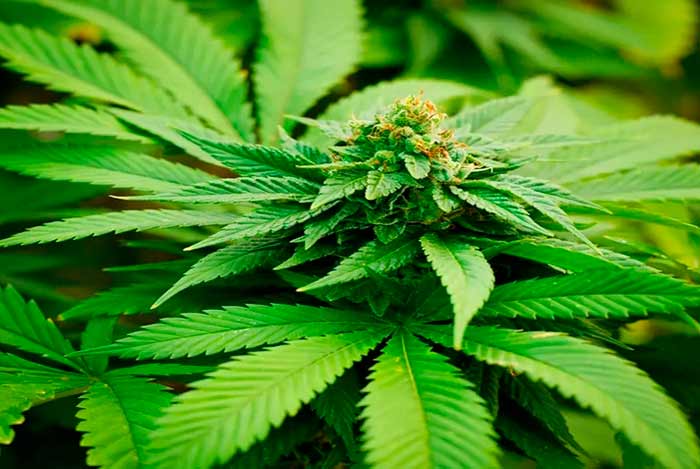
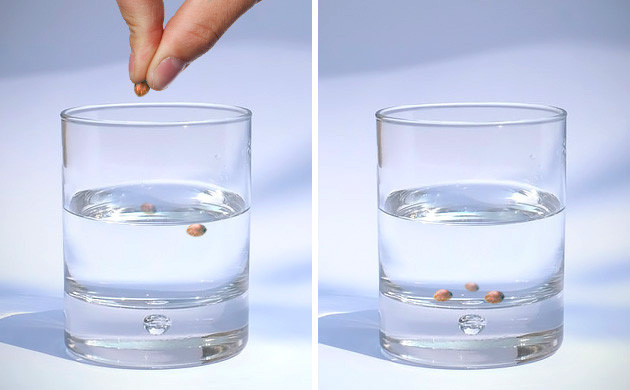
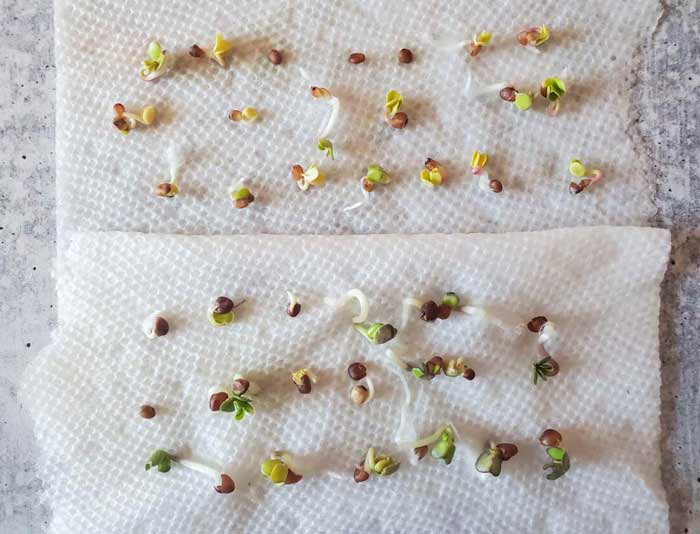
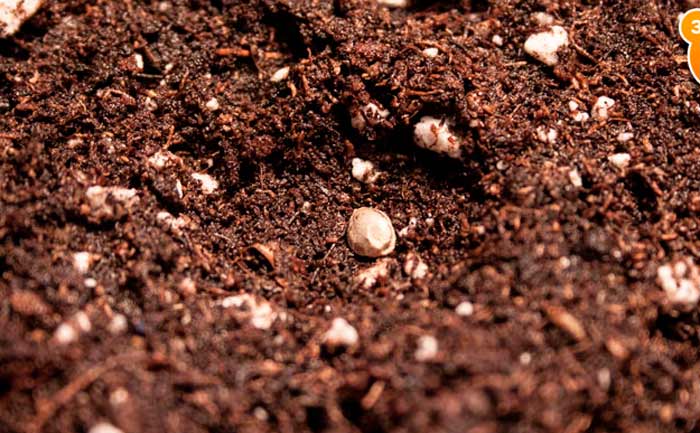
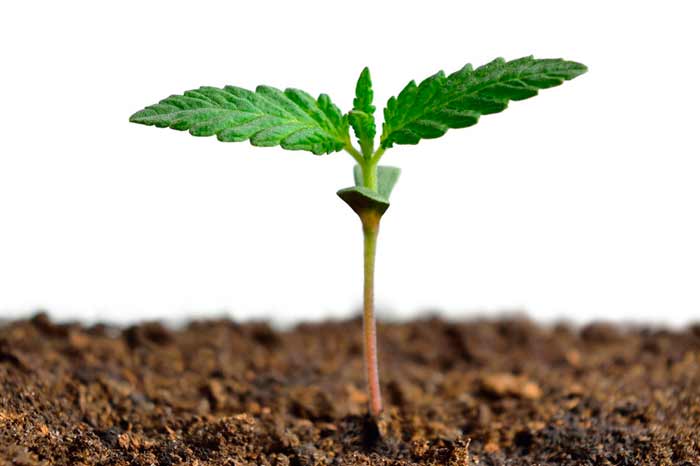
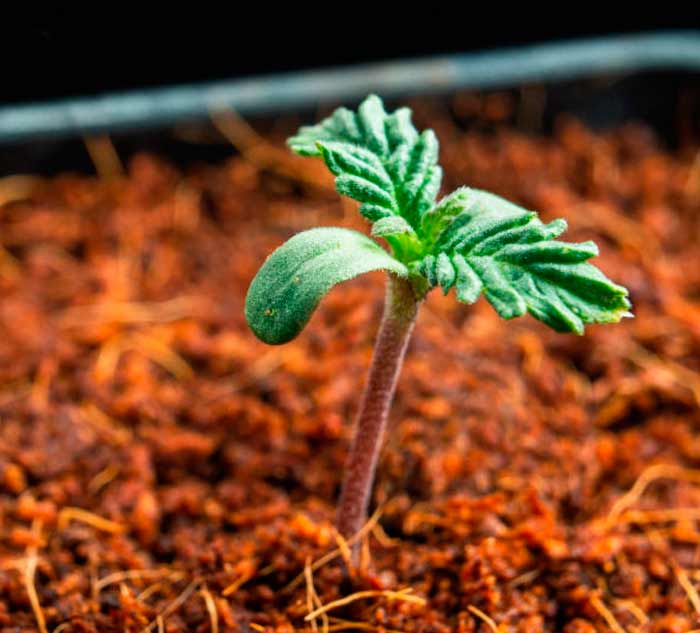
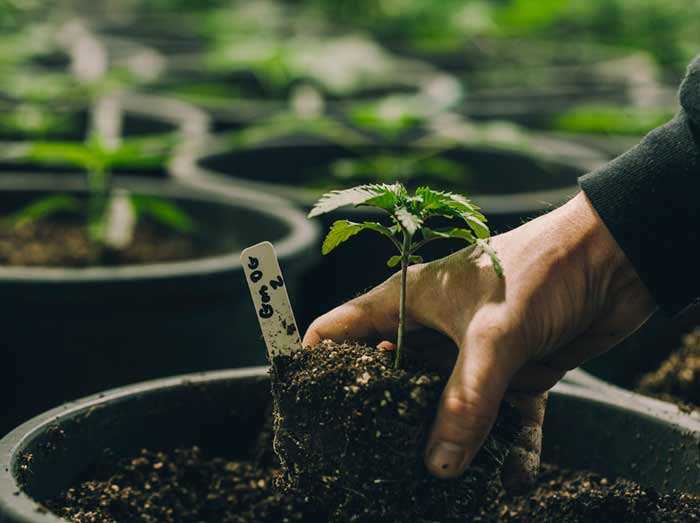
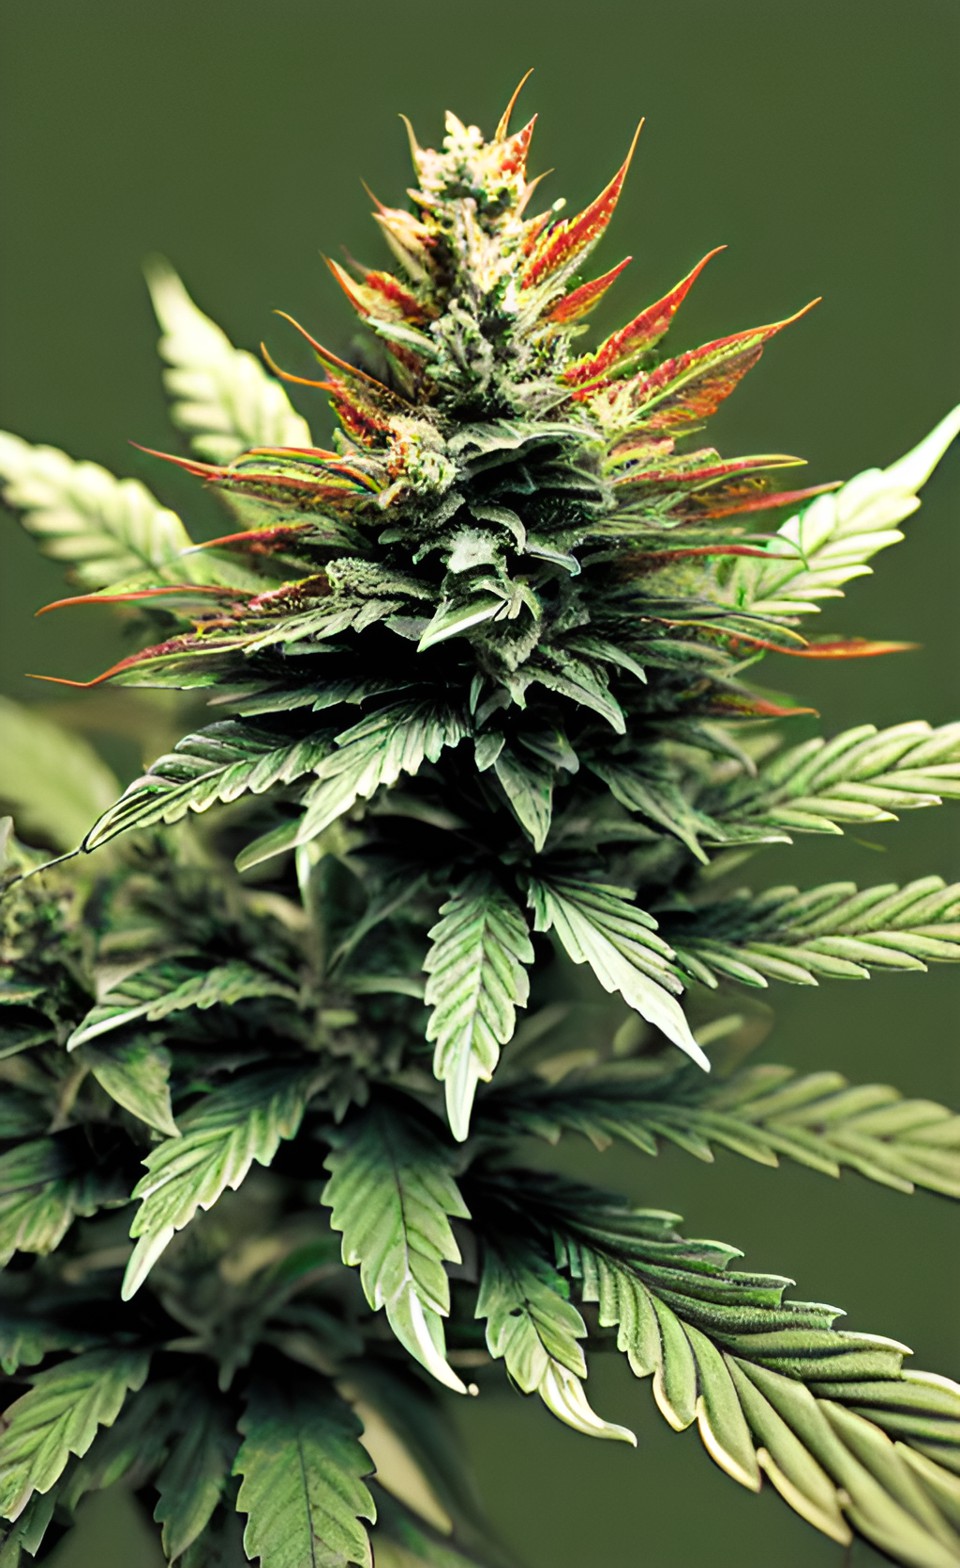
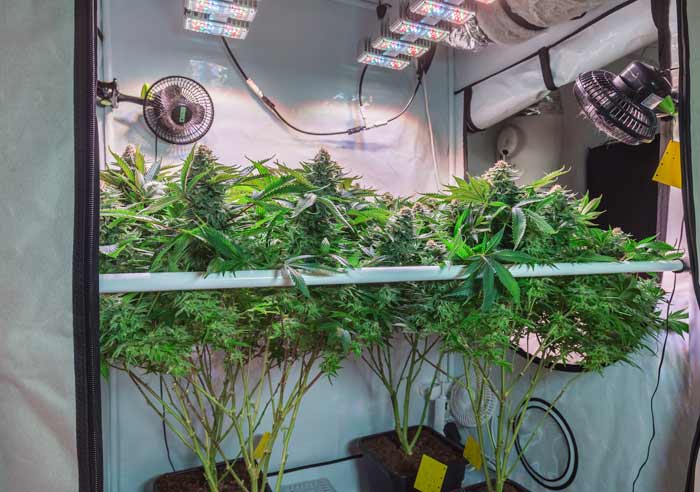
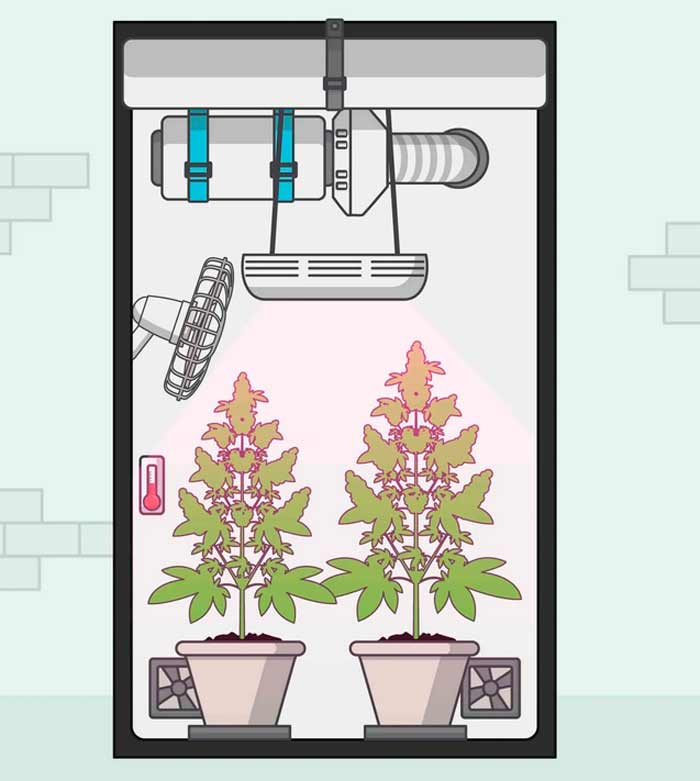

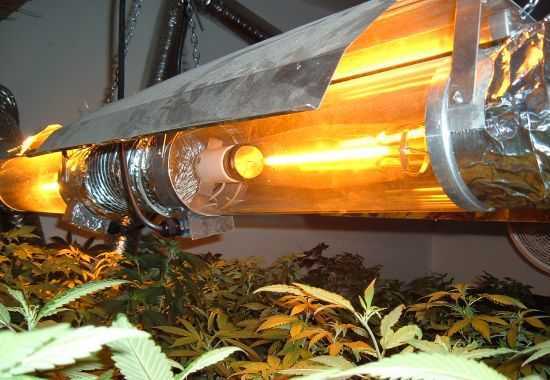
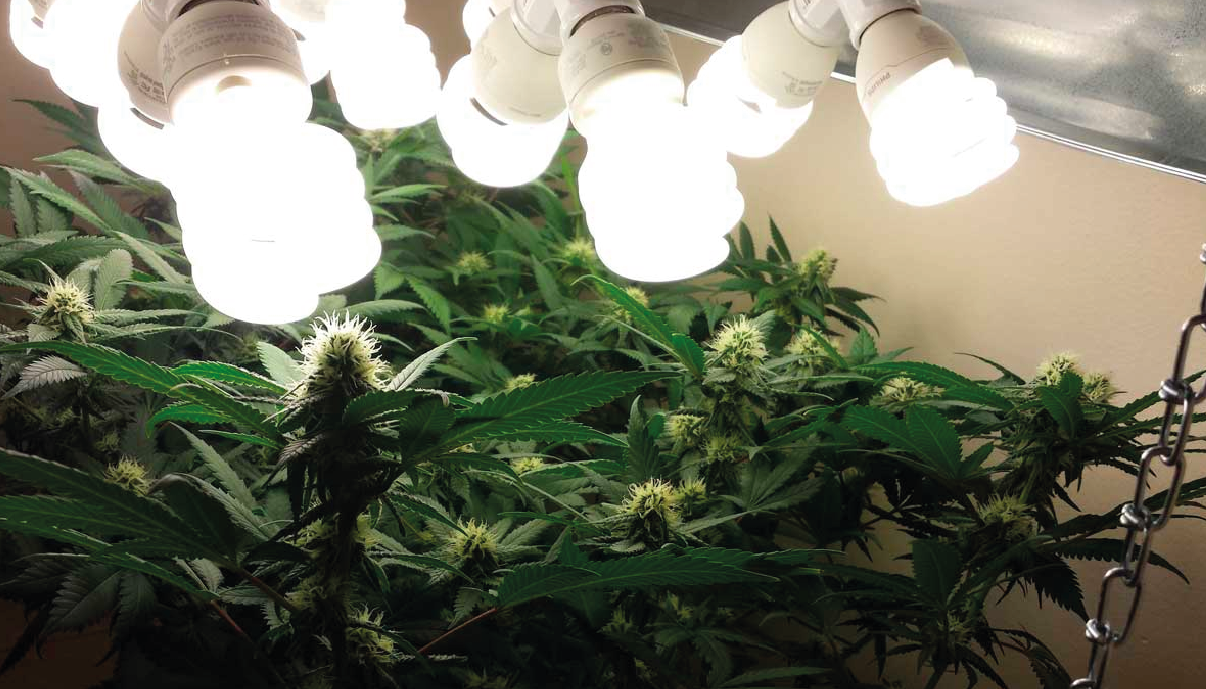
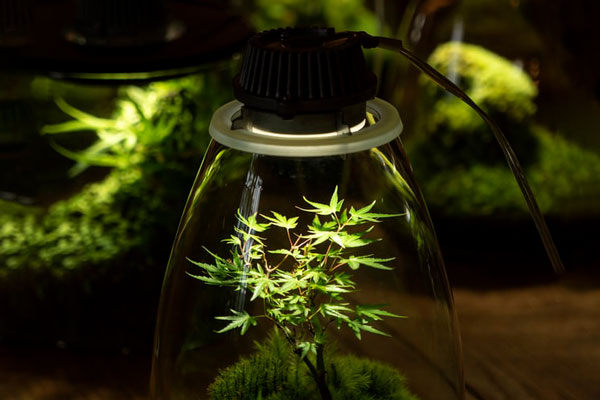
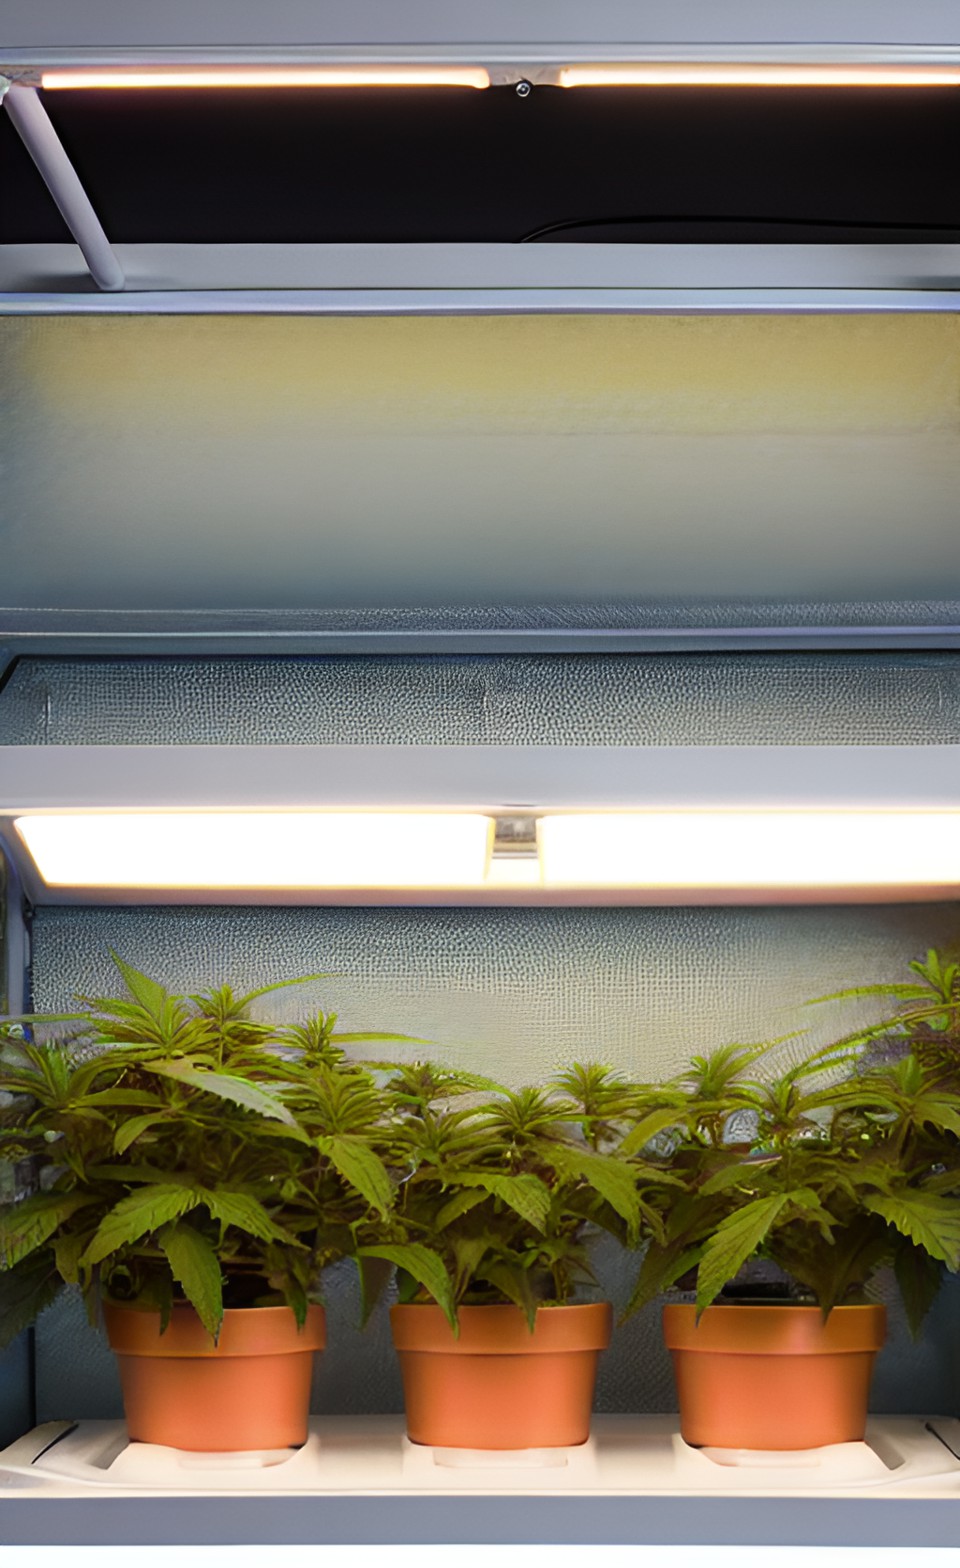
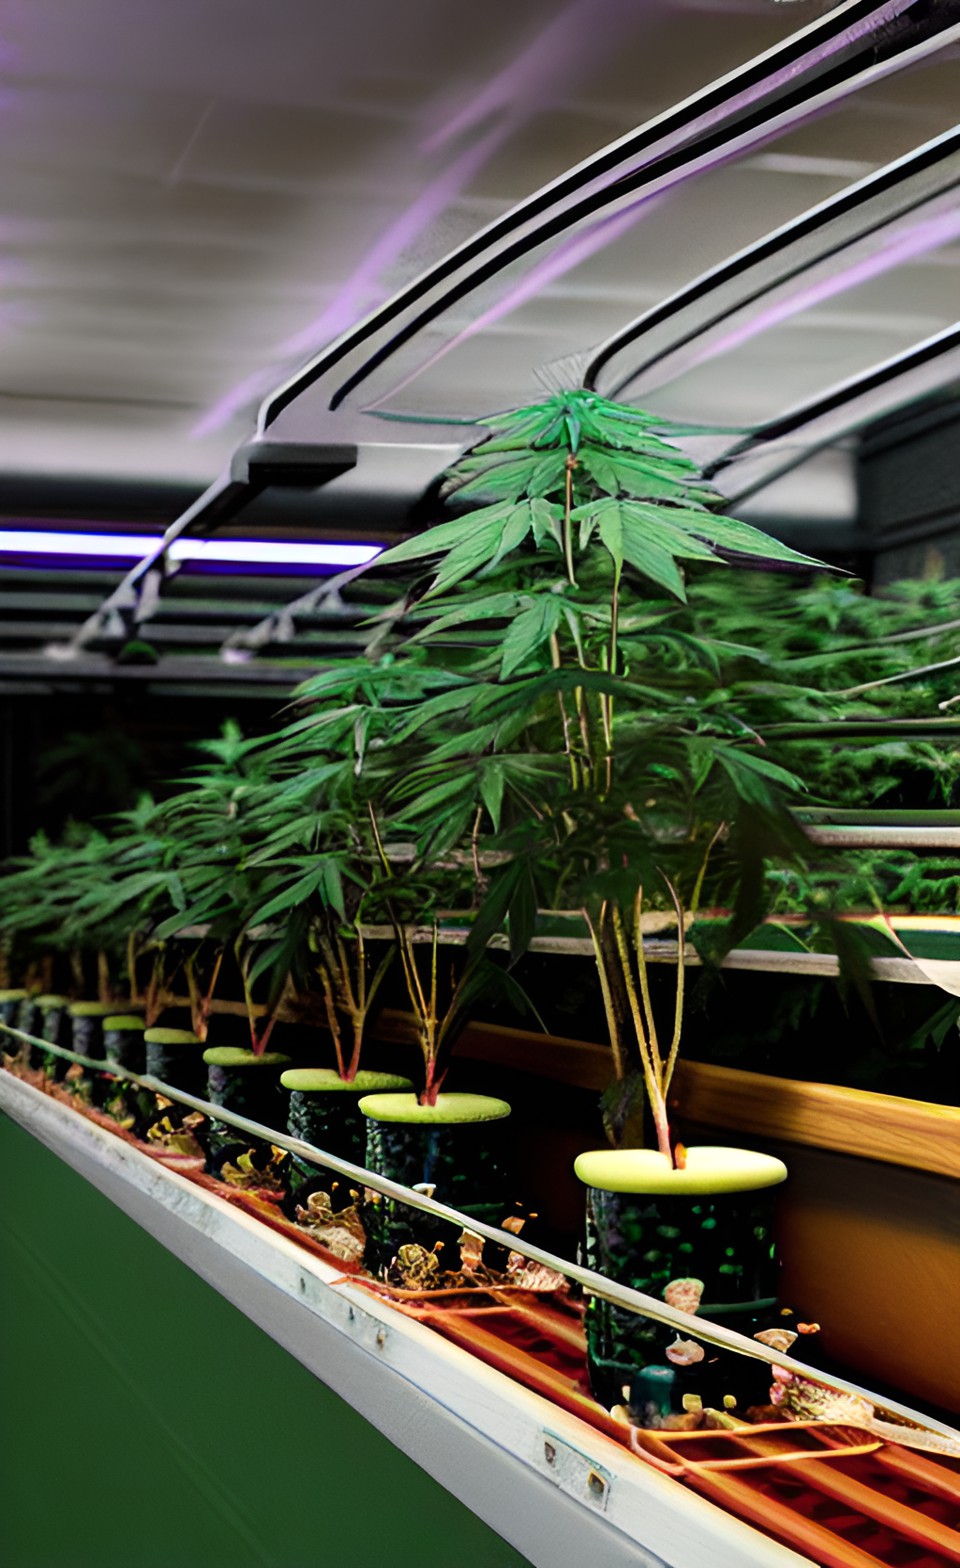
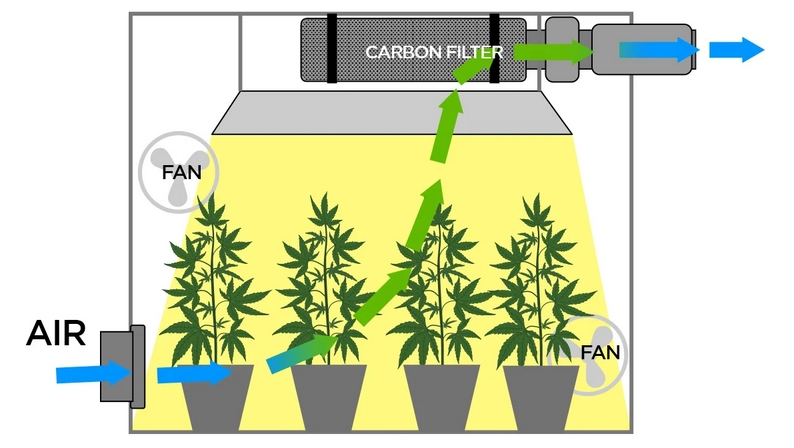
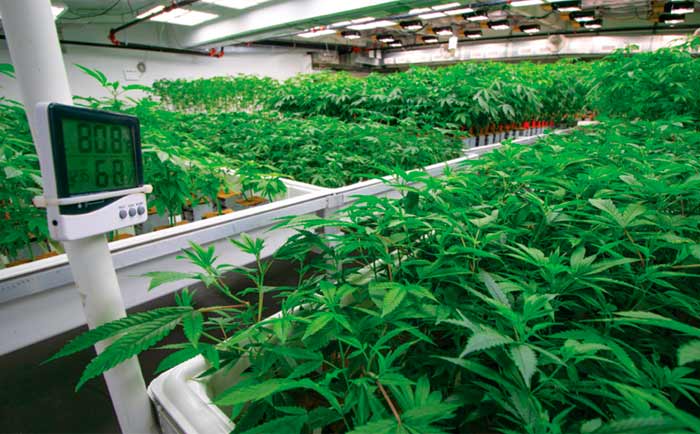
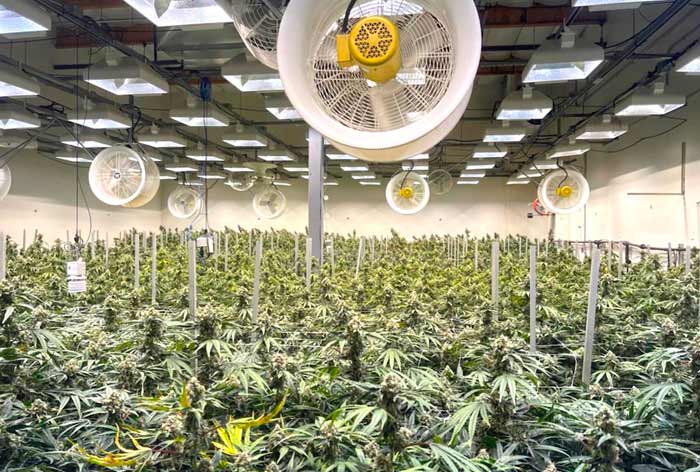
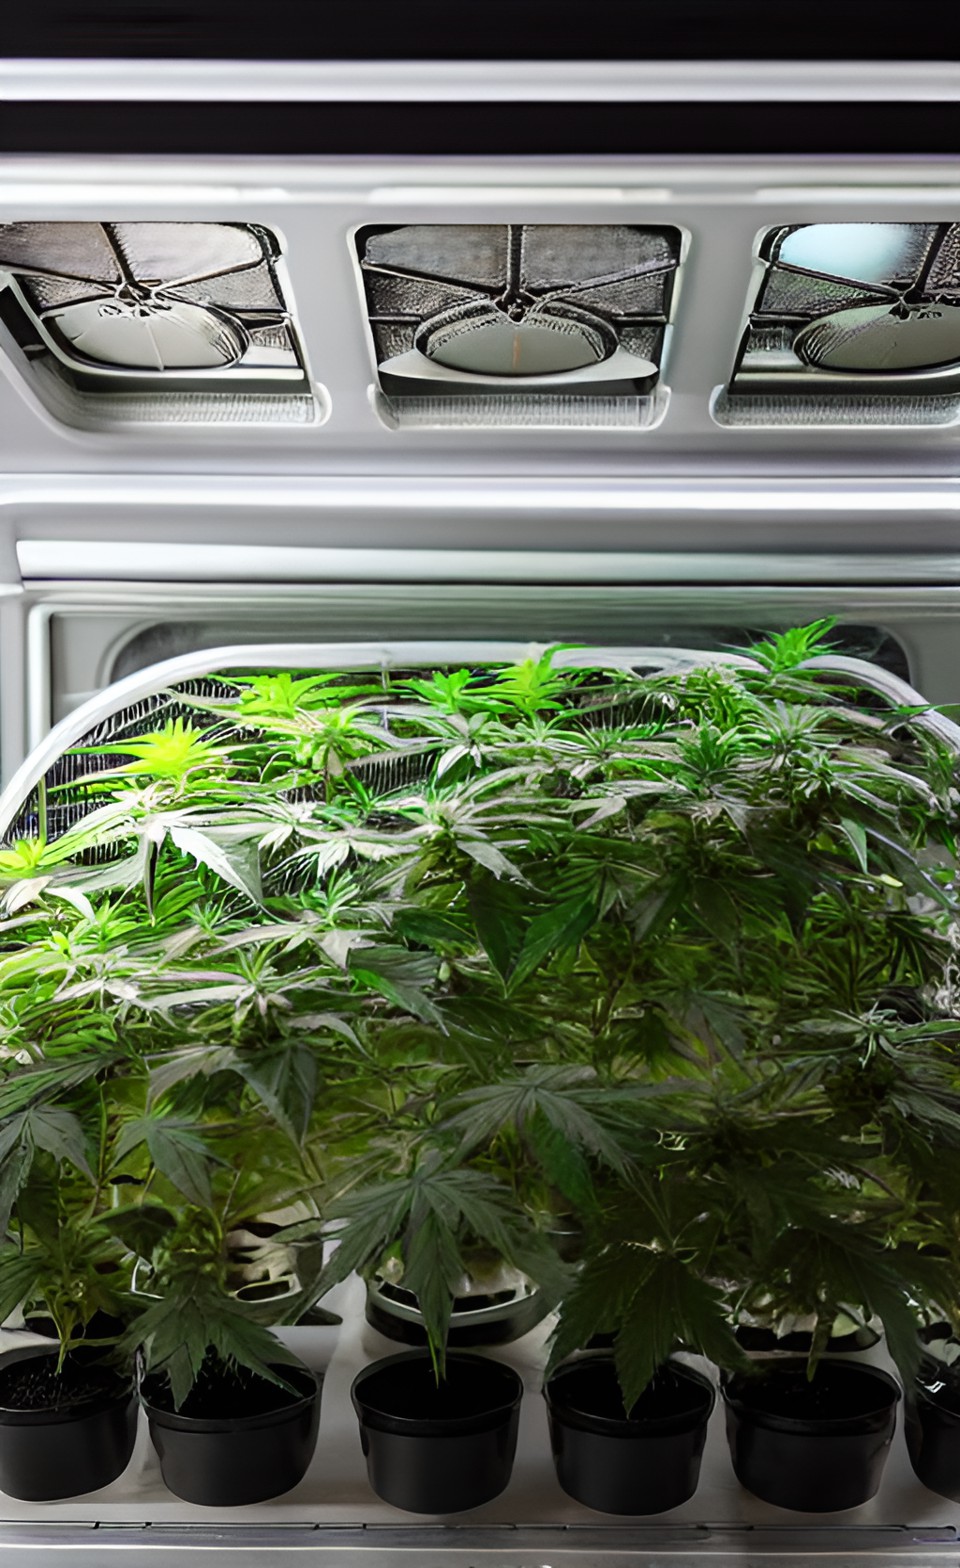
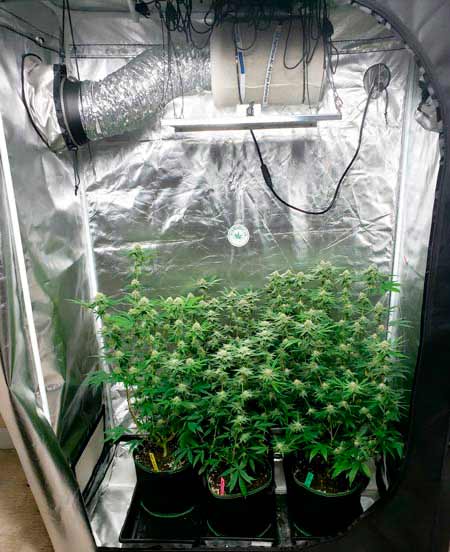
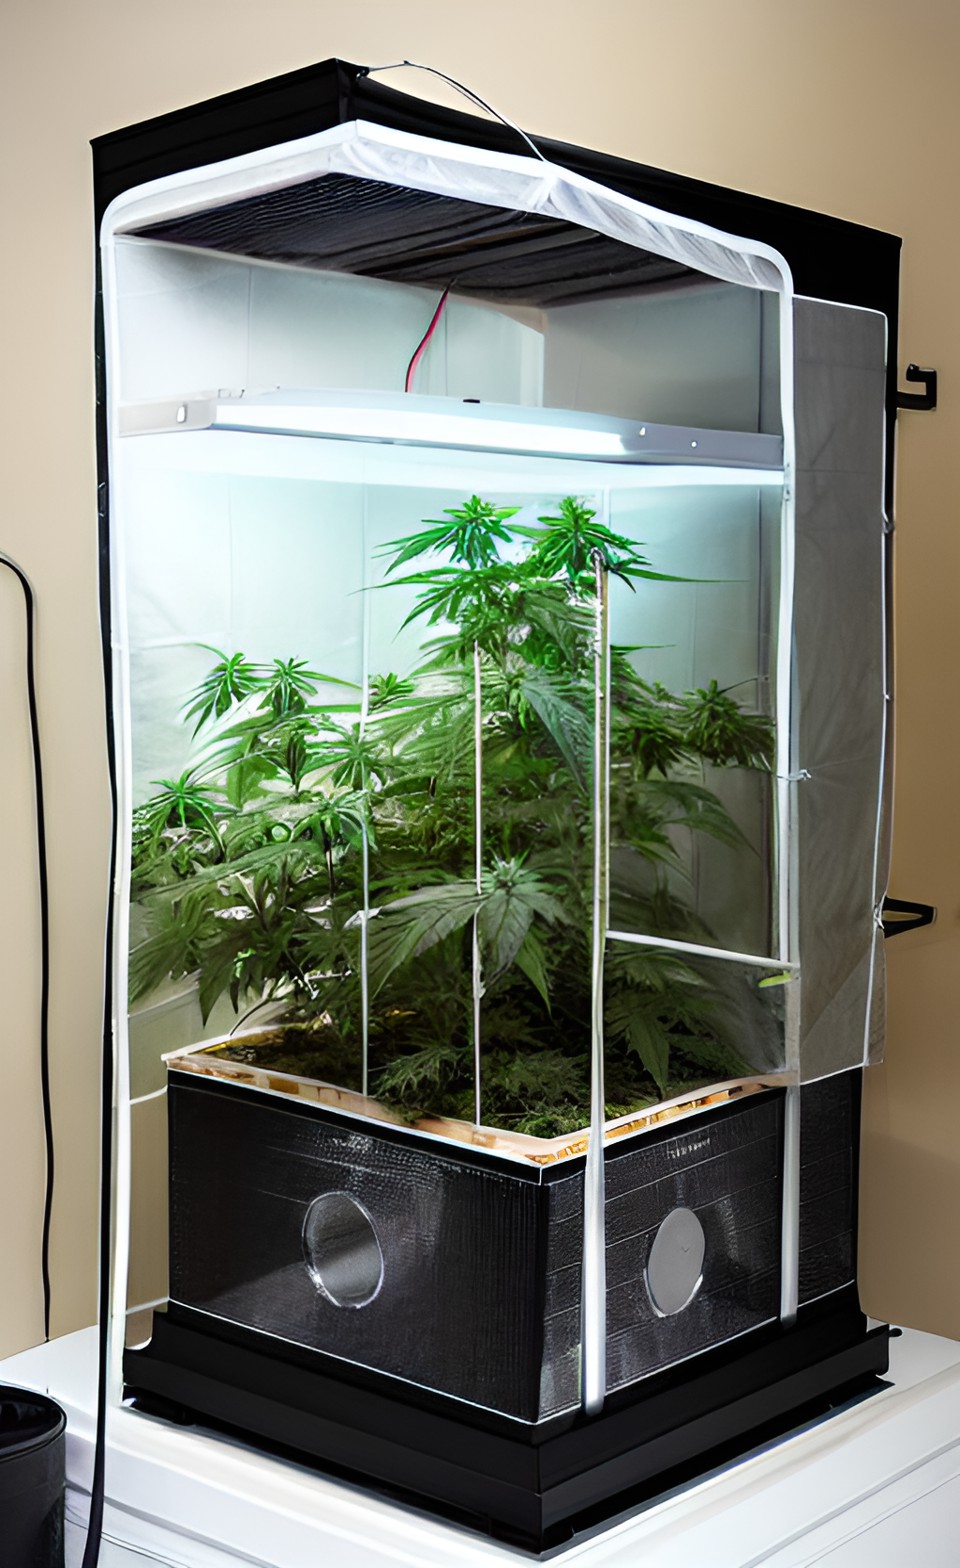

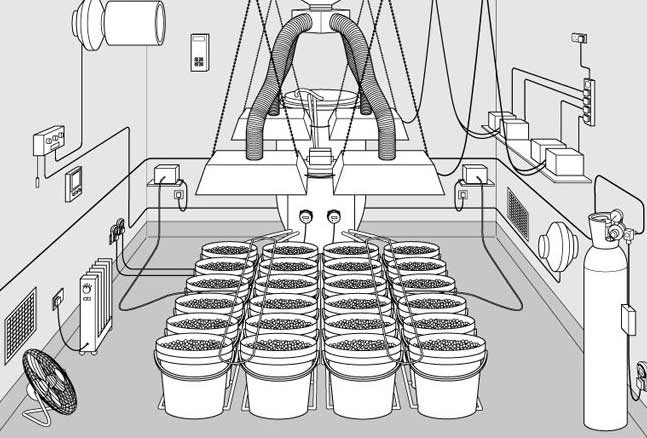
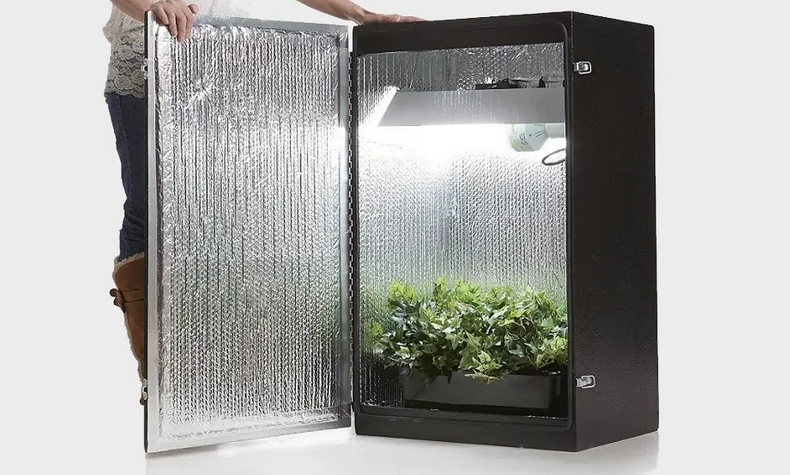
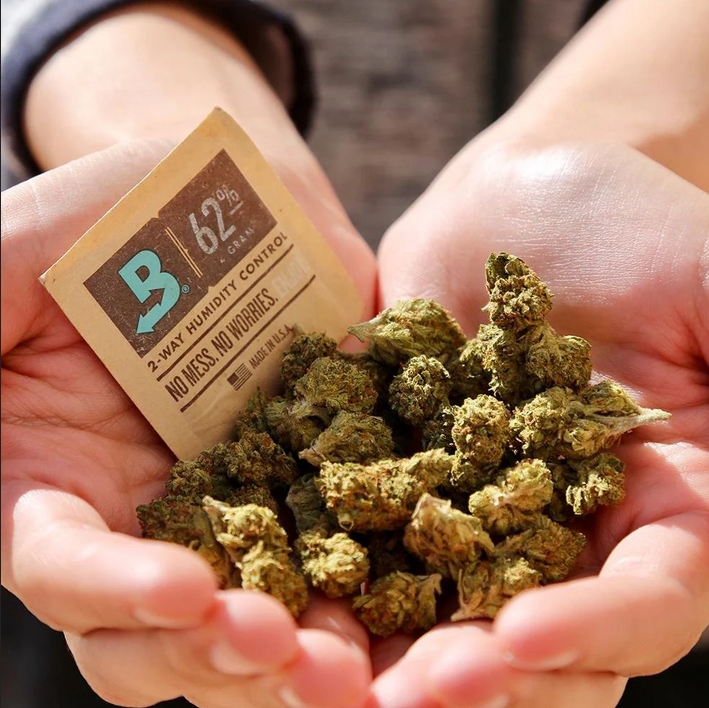
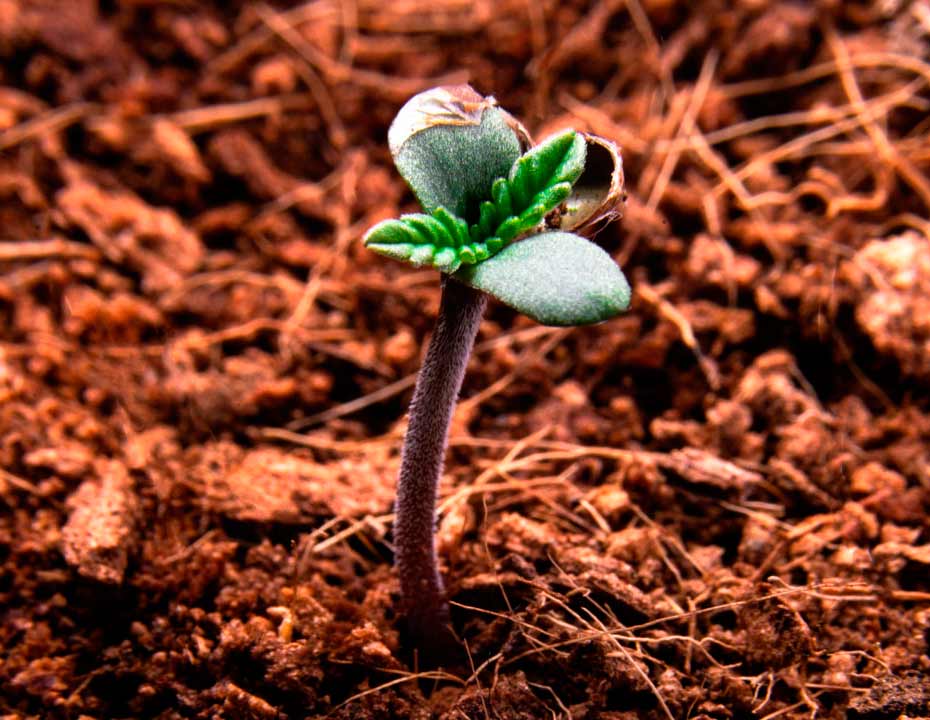
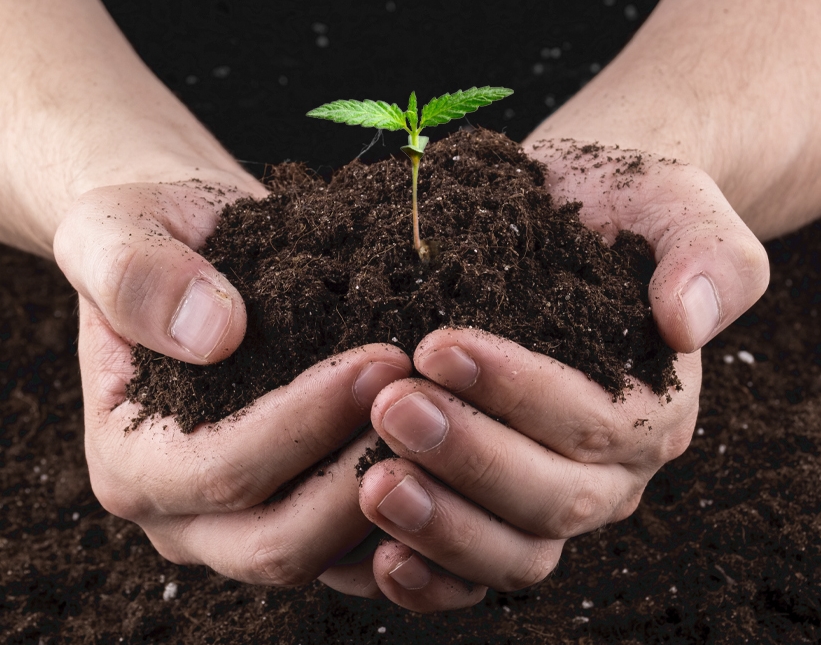
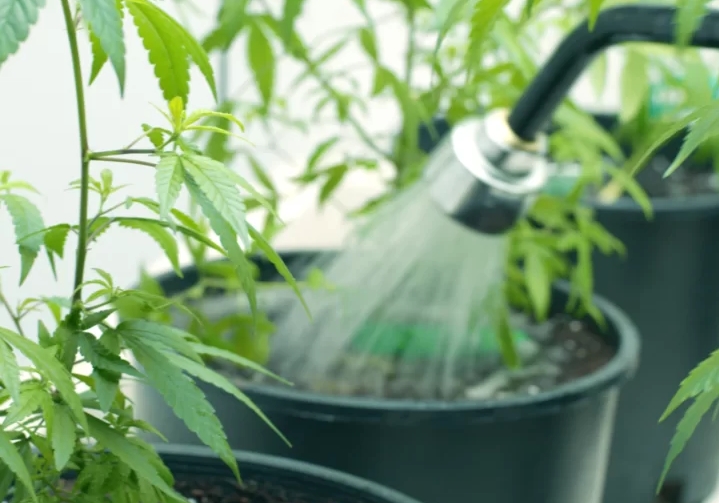
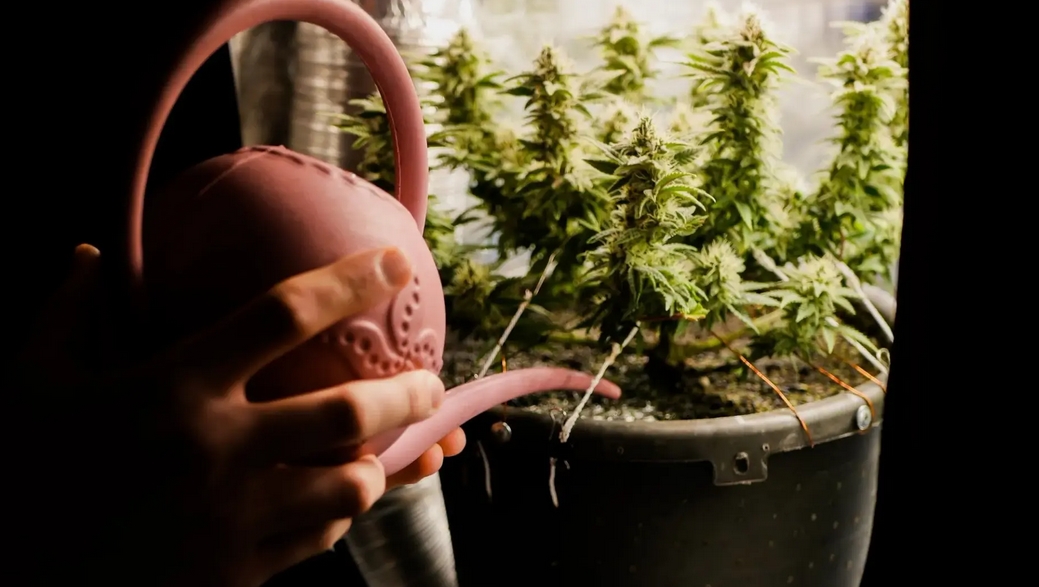
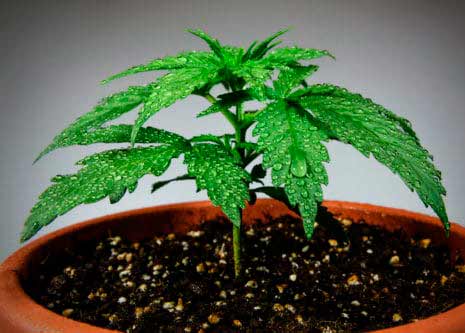
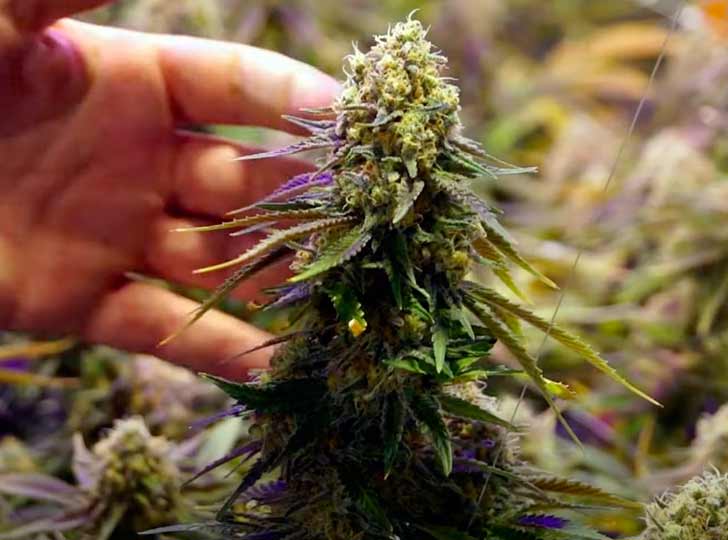
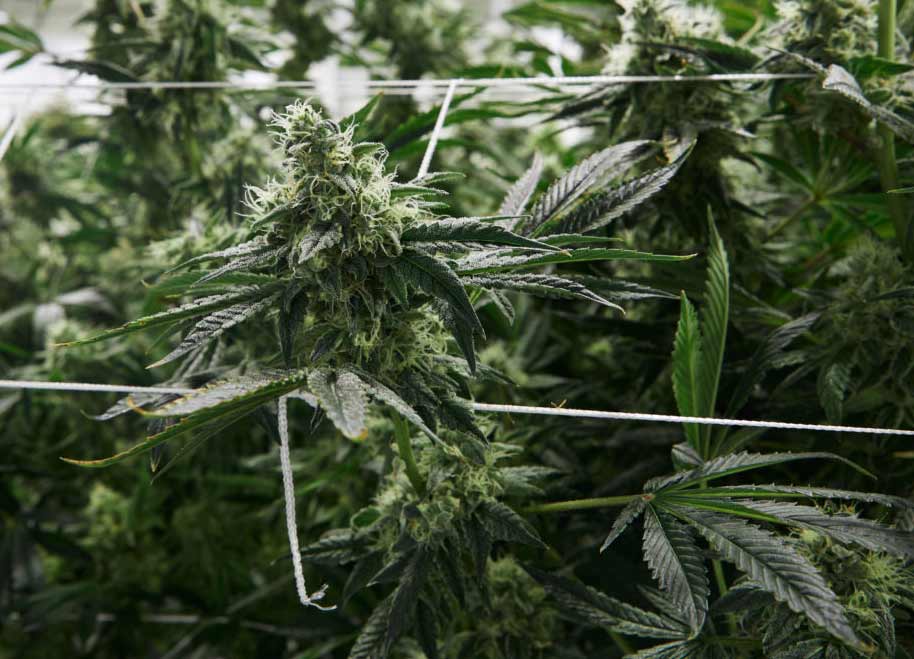
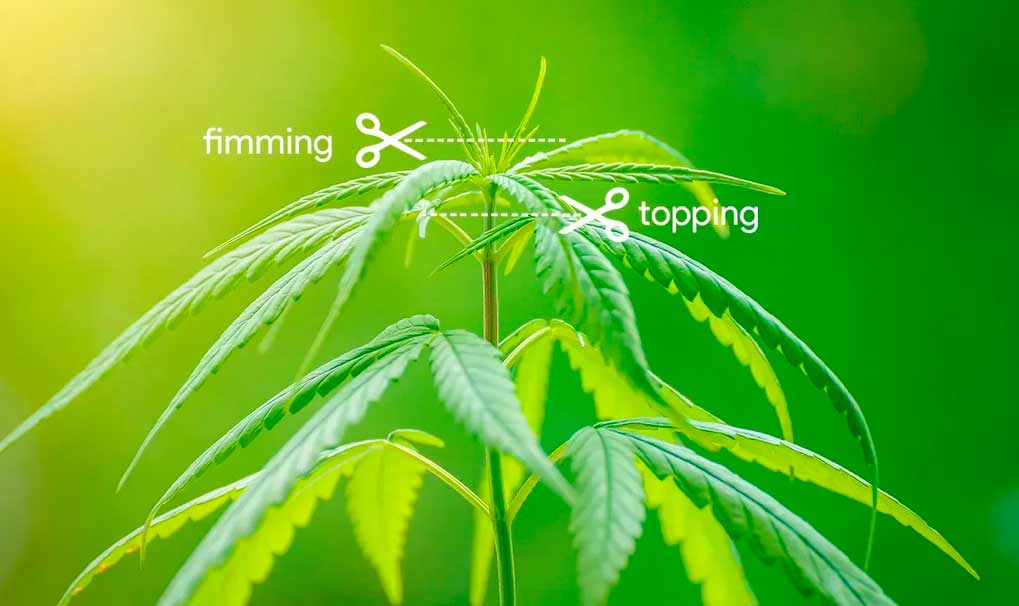
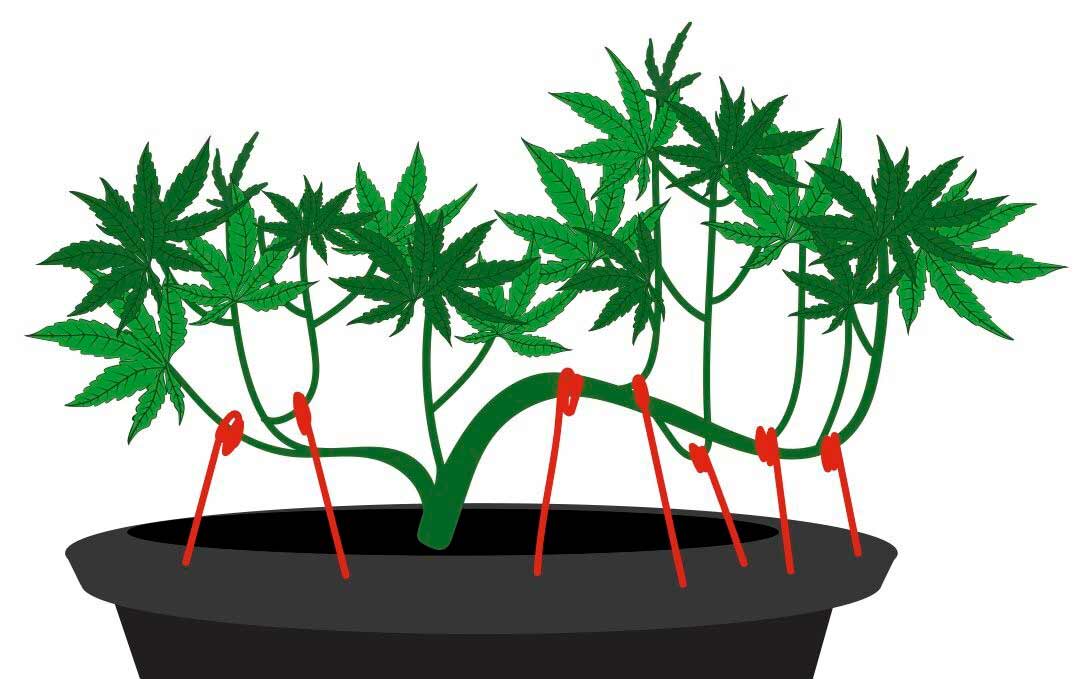
")
")